
The world of immersive content has reached new heights in 2026, with creators everywhere embracing the power of 360 and 3D storytelling. Innovative tools like the insta360 evo have fueled this creative explosion, making advanced capture accessible to more people than ever.
Whether you are just starting out or have years of experience, this handbook is your go-to resource for mastering every aspect of the insta360 evo. My goal is to share practical advice, insider tips, and the latest insights so you can unlock the full potential of this unique camera.
Inside, you will find clear explanations of the evo’s standout features, straightforward setup instructions, shooting techniques, editing workflows, troubleshooting advice, and professional tips for elevating your content.
Ready to transform your approach and create unforgettable immersive experiences? Let’s dive into the guide and see what the insta360 evo can do for you.
Contents
Insta360 Evo overview: What makes it unique in 2026
The world of immersive imaging has evolved rapidly, and the insta360 evo stands out as a true game-changer in 2026. Whether you are a creator, educator, or enthusiast, understanding what makes this camera special will help you make the most of its potential.
Design and build quality
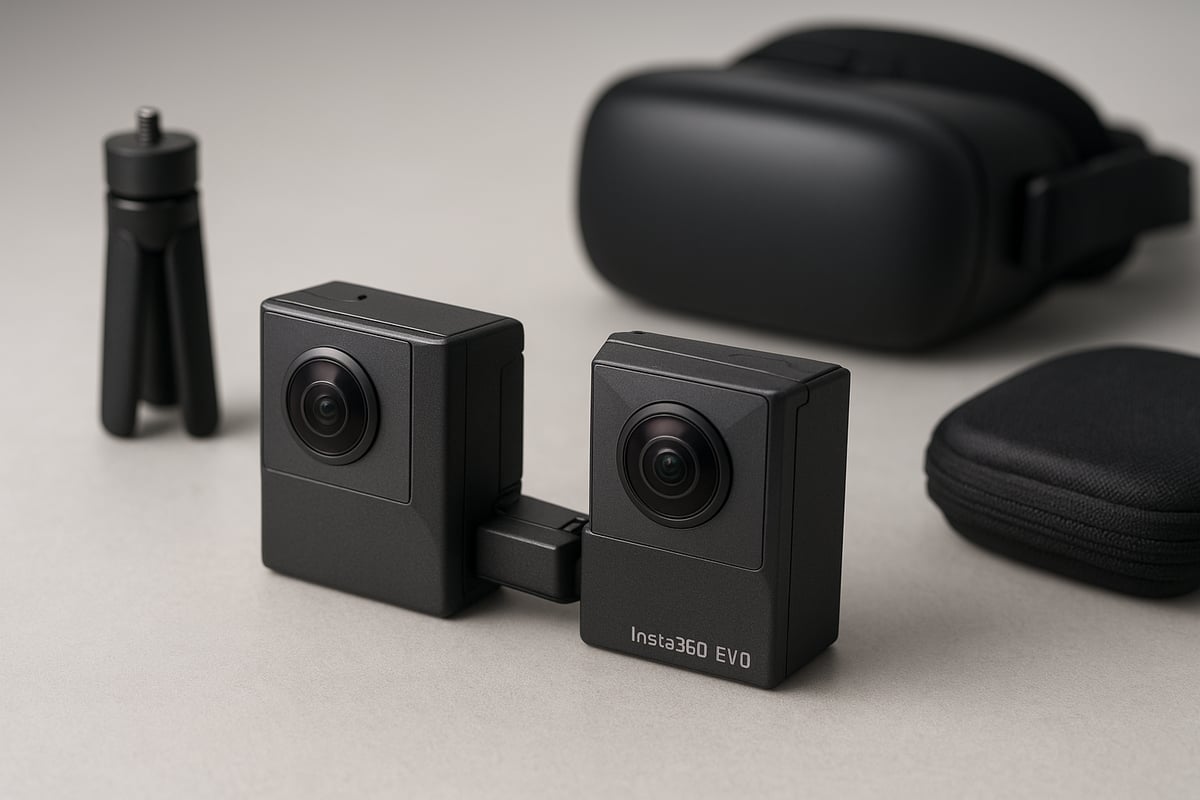
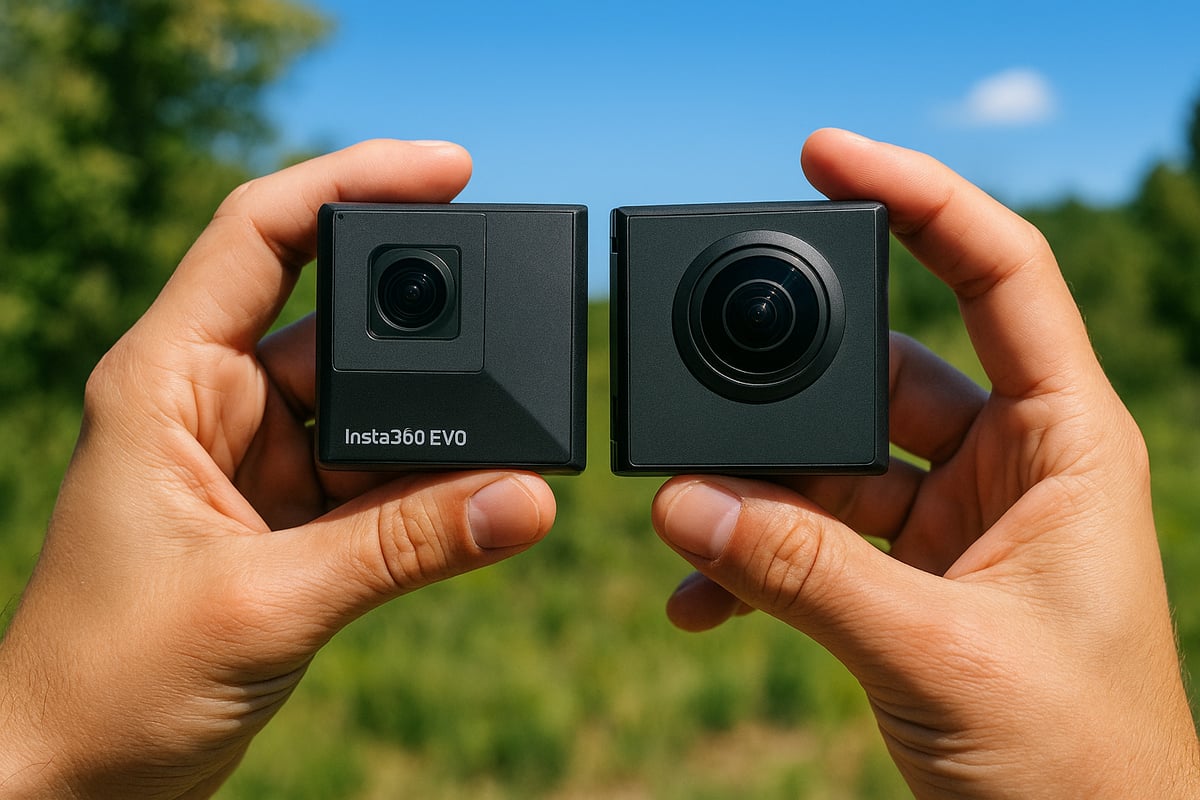
The insta360 evo features a clever foldable design that lets you switch between 360 and 180 3D capture in seconds. This flexibility is a huge advantage for creators who want both immersive and stereoscopic footage without carrying extra gear.
Recent models have improved their materials, using reinforced hinges and scratch-resistant lens coatings. The body feels solid yet remains lightweight, making it ideal for travel and daily vlogging. Many users praise the camera for its pocketable size and ergonomic grip, noting how easy it is to set up and use, even on the go.
Key features and technical specs
At the core of the insta360 evo is its dual-lens system, enabling both 360 and 3D content creation. In 2026, the evo delivers sharp 6K video and crisp 20MP photos, with advanced sensors that handle low light impressively well. Improved battery life now supports up to 100 minutes of continuous shooting, and USB-C fast charging is a welcome upgrade.
Connectivity is seamless, thanks to Wi-Fi and Bluetooth integration, letting you control the camera and transfer files quickly via the dedicated app. The app’s intuitive interface makes it easy to adjust settings and preview your shots, whether you are a beginner or a seasoned pro.
Standout upgrades since launch
Over the years, the insta360 evo has received significant firmware updates. AI-powered stabilization now rivals gimbal-level smoothness, and subject tracking is impressively reliable. New shooting modes, such as hyperlapse and cinematic slow motion, have expanded creative options for users.
Integration with leading VR headsets and content platforms is smoother than ever. Many in the community have highlighted how these upgrades have improved their workflow and enabled them to produce more engaging, professional-quality content.
How Evo compares to competitors
When comparing the insta360 evo to models like Ricoh Theta and GoPro Max, its folding mechanism and ability to switch between 360 and 3D make it uniquely versatile. While competitors offer high resolutions and robust stabilization, the evo stands out for its dual-function build and compact form factor.
Here is a quick comparison:
| Camera | 360/3D Modes | Resolution | Portability | Price (2026) |
|---|---|---|---|---|
| insta360 evo | Both | 6K/20MP | Excellent | $$ |
| Ricoh Theta X | 360 only | 5.7K | Good | $$ |
| GoPro Max | 360 only | 5.6K | Good | $$ |
For more insights on how the evo stacks up, check out this Best GoPro-like cameras roundup.
Market research shows the insta360 evo has steadily gained popularity, especially among creators who value versatility and compact design.
Who should use the Insta360 Evo?
The insta360 evo is a fantastic tool for a wide range of users. Content creators, vloggers, and VR storytellers benefit from its flexible shooting modes, while educators are using it to create interactive learning experiences. Beginners appreciate the intuitive controls, while advanced users can unlock deeper features for professional results.
In 2026, real-world examples include travel vloggers capturing immersive journeys, real estate agents producing virtual tours, and educators making interactive lessons. Community feedback remains overwhelmingly positive, with many users citing satisfaction with the camera’s performance, ease of use, and ongoing support.
If you are seeking a camera that grows with your skills and creative ambitions, the insta360 evo deserves a close look.
Getting started: Setting up your Insta360 Evo
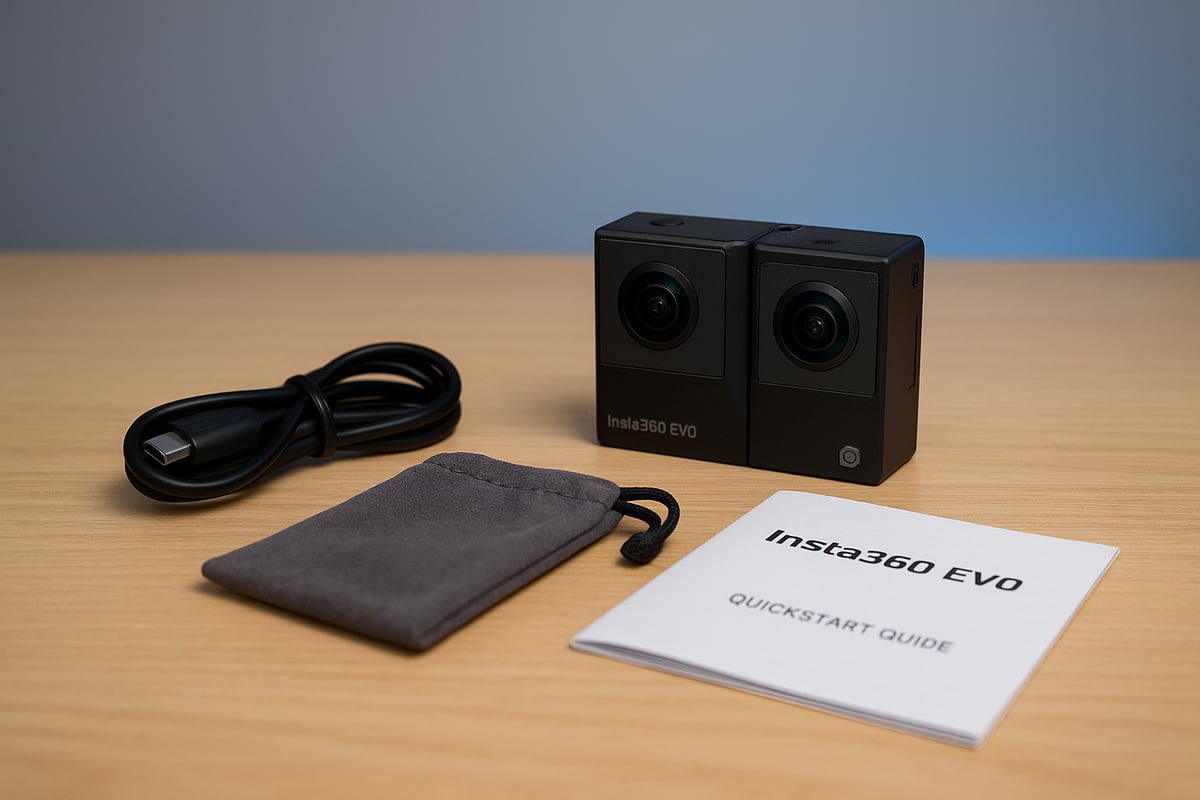
Unboxing a new camera never gets old, and the insta360 evo is no exception. Inside the 2026 box, you will find the camera, a USB-C charging cable, a protective pouch, lens cloth, and the updated quick start guide. Right away, check that you have all items before proceeding.
Before anything else, charge your insta360 evo fully to ensure a smooth first setup. Insert a compatible microSD card, which is critical for performance and reliability. If you are unsure which memory card offers the best speed and longevity, consult this Best memory cards for cameras guide for up-to-date recommendations.
Once powered on, the camera will prompt for firmware updates if available. Connect to Wi-Fi and follow the on-screen steps. Keeping firmware current will unlock new features and boost stability. A quick restart after updating is always a good idea.
Connecting to the Insta360 app
Pairing your insta360 evo with the official app is straightforward. Start by enabling Wi-Fi and Bluetooth on your phone. Open the Insta360 app, tap the camera icon, and follow the prompts to connect. The camera’s display will show a connection code for verification.
Once paired, you can access all camera settings, monitor live views, and manage media. The app’s 2026 interface is more intuitive than ever, but if you hit a snag, try restarting both devices or toggling airplane mode to reset connections. The app’s help section is also a solid resource.
Camera configuration and essential settings
Now, it is time to set up your insta360 evo for your shooting style. Choose between 360 and 180 3D modes with a simple menu toggle. For general use, I recommend 5.7K resolution at 30fps, which balances quality and storage. Enable FlowState stabilization for smooth footage, especially if you are shooting handheld.
White balance is best left on Auto for most users, but in bright outdoor scenes, try locking it for more consistent results. If you are starting out, stick with default settings, then experiment as you gain experience. The camera remembers your last-used configuration for convenience.
Mounting and accessories
The insta360 evo is designed for flexibility, whether you are vlogging, traveling, or creating VR content. For best results, use a lightweight tripod or selfie stick to stabilize your shots. The folding design makes handheld use comfortable, but mounting gives you sharper, more immersive footage.
Consider a silicon case for extra protection, especially if you are on the go. Accessories like lens guards and remote controls can further expand your creative options. Always check compatibility before purchasing new add-ons for your insta360 evo.
First test shots and reviewing footage
With your setup complete, take your first 360 and 3D shots. Press the shutter button for photos, or hold for video. The insta360 evo stores files on the memory card in .insv and .insp formats, optimized for immersive content.
To review, connect the camera to your phone or use the app’s gallery. Playback supports full 360 and 3D previews, so you can instantly assess framing and quality. Keep an eye on available storage, especially when shooting high-res video, to avoid missing moments.
Mastering shooting techniques with the Evo
Capturing immersive content with the insta360 evo is both an art and a science. Mastering the camera’s shooting techniques opens up creative possibilities, whether you are documenting travel, producing educational materials, or sharing moments with friends. Let’s explore practical strategies and tips for making the most of your evo in the field.
360 and 3D capture: Modes and creative use cases
The insta360 evo stands out for its ability to switch seamlessly between 360 and 180 3D modes. Use 360 mode when you want to capture the full environment, like bustling markets, landscapes, or social gatherings. This mode is perfect for viewers who want to look around and explore every angle.
Switch to 180 3D when depth and realism are key. This setting shines for vlogs, interviews, or educational demos where you want subjects to pop with a sense of presence. The 3D effect is particularly engaging for VR headsets, pulling viewers into the scene.
Common use cases include travel diaries, real estate walkthroughs, and event coverage. Educators also leverage the insta360 evo to create interactive lessons. The camera’s flexibility means you are never limited by a single perspective.
Composition and framing tips for immersive media
With the insta360 evo, composition is less about framing a rectangle and more about guiding the viewer’s eye through a sphere. Think about your main subject’s placement relative to the camera. In 360 mode, avoid standing too close to the lenses, as this can cause distortion and stitching artifacts.
Keep your main action slightly off-center to encourage exploration while maintaining clarity. Use leading lines in the environment, such as roads or railings, to direct viewers’ gaze. Good lighting is essential: soft, even light minimizes harsh shadows and enhances depth.
Be mindful of blind spots and stitching lines by keeping key elements away from the seams. When shooting 3D, position subjects at least one meter from the camera for natural depth. Experiment with angles and movement to find what feels most immersive.
Step-by-step: Shooting a 360 video
Start by scouting your location. Walk around with the insta360 evo to identify interesting angles and potential distractions. Set your camera to 360 mode and choose your resolution and stabilization settings for the situation.
Mount the camera on a tripod or handheld stick. Press record, then move slowly and smoothly if you are walking with the camera. Pause after key moments to let the scene breathe. Review footage on the app to check for missed details or exposure issues.
If needed, adjust your position and retake shots. The beauty of the insta360 evo is its forgiving workflow—mistakes can be fixed with another quick take. Practice makes perfect, and you will soon develop an instinct for the best 360 compositions.
Step-by-step: Shooting a 3D 180 video
For 3D 180, unfold the insta360 evo and face the lenses toward your subject. Place the camera at eye level for a natural perspective. Ensure your subject is centered and at the correct distance—too close can feel overwhelming, too far loses the 3D effect.
Lock exposure and white balance to prevent shifts mid-shot. Frame your scene so there is depth between foreground and background elements. Begin recording and encourage your subject to interact naturally with the camera.
Review your footage in the app, preferably on a VR headset, to confirm the 3D effect is strong. Adjust camera placement or subject distance as needed. With practice, you will learn to balance realism and immersion for compelling 3D content.
Advanced features: Timelapse, HDR, and slow motion
The insta360 evo offers advanced shooting modes to push your creativity further. Activate timelapse for dynamic scenes like sunsets or cityscapes. Select your interval and duration, then keep the camera stable for smooth results.
HDR mode is ideal for high-contrast environments. Enable it to capture details in both shadows and highlights. For slow motion, switch to the highest frame rate available and record movement – dancing, water splashes, or sports – then enjoy the dramatic playback.
Experiment with these features to add variety to your content. Use the app to preview and tweak settings before shooting. Over time, you will discover which modes best match your style and subject matter.
Audio capture and external mic options
While the insta360 evo’s built-in microphones provide decent audio, external mics can elevate your production, especially for vlogs or interviews. Look for lightweight, omnidirectional microphones that connect easily to your recording device.
Consider windshields for outdoor shoots and lavalier mics for hands-free operation. Many creators recommend compact shotgun mics for focused sound. Syncing external audio in post-production is straightforward with the right editing software.
For more on gear recommendations, check out this detailed guide to best vlogging camera gear. Investing in proper accessories ensures your insta360 evo footage not only looks immersive but sounds professional, too.
Editing and sharing your Evo content
Creating immersive content with the insta360 evo is only half the journey. The real magic happens when you bring your footage into the editing room and prepare it for the world to see. Whether you are polishing a travel adventure or prepping a VR experience, the right workflow makes all the difference.
Importing and organizing footage
The first step is getting your insta360 evo files onto your device. I recommend using the included USB cable or a fast microSD card reader. Once transferred, create a dedicated folder structure for your projects. For example, set up folders for raw footage, edits, and exports. This keeps your workflow efficient and prevents losing important moments.
Always back up your footage right away. Use an external drive or cloud storage to ensure nothing gets lost. The evo produces large video files, so make sure you have plenty of space. Label your files with clear names and dates for quick access later. Staying organized saves time and frustration during editing.
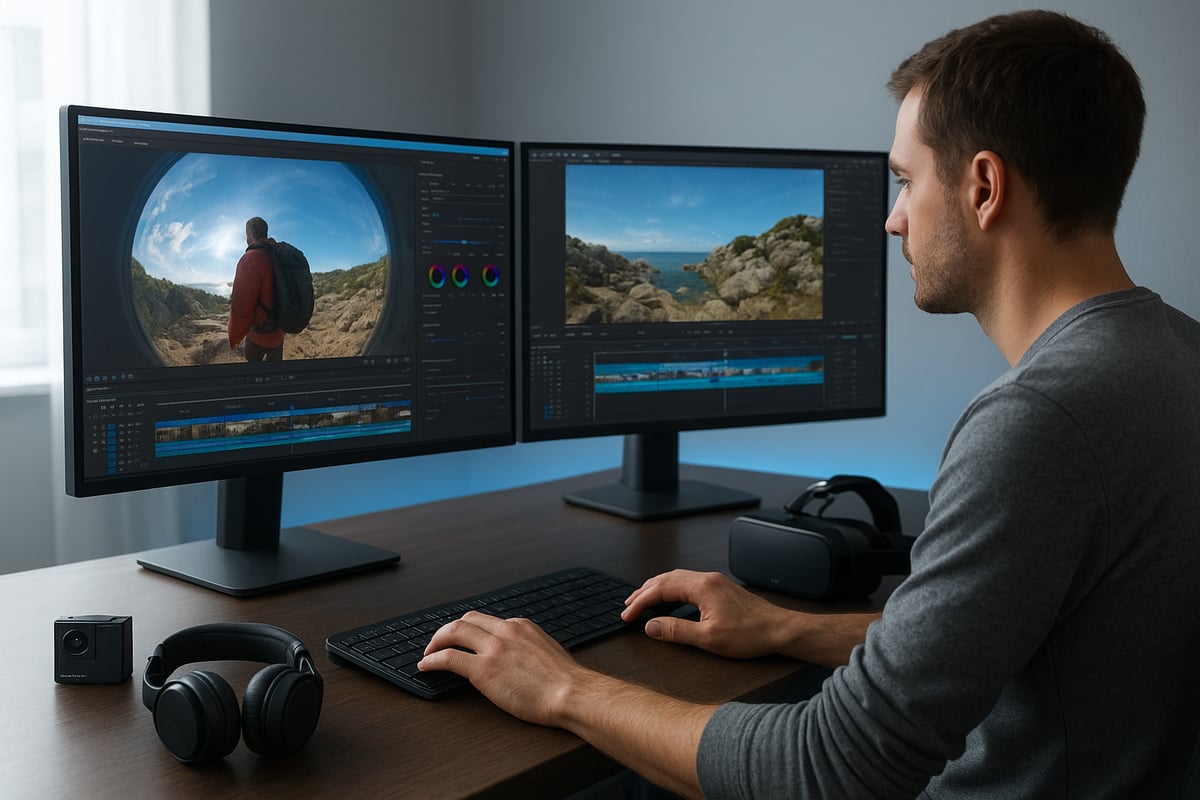
Editing with Insta360 Studio and mobile app
Insta360 Studio and the mobile app are both powerful tools for processing your evo footage. The desktop software offers deeper control, including stabilization, trimming, and reframing. The app makes quick edits and social media sharing a breeze. For creators who want to push their edits further, consider exploring the Best photo editing software to enhance your insta360 evo images before export.
Start with basic color correction and stabilization. Use keyframing to control camera angles in your 360 videos. Add effects, transitions, or text overlays for a polished finish. Export your edits in the format best suited to your intended platform. Take advantage of batch processing for large projects to save valuable time.
VR and 3D editing workflow
Editing VR and 3D footage from the insta360 evo requires a few extra steps. Always preview your edits using a compatible VR headset or viewer to check for stitching errors and depth alignment. When exporting, use settings specifically designed for platforms like YouTube VR, Oculus, or Pico, such as 5.7K resolution and proper stereoscopic layout.
Keep your 3D and 360 content organized separately for easy access. Consider using LUTs designed for immersive video to maintain color consistency. Test your final exports in different headsets to confirm compatibility and a smooth viewing experience. A careful workflow ensures your audience enjoys the full impact of your immersive stories.
The insta360 evo shines when you share your creations. Platforms like YouTube, Facebook, and TikTok all support 360 and 3D uploads, but each has its own requirements. For YouTube VR, upload in equirectangular format and select the correct 360 or 3D settings. Facebook supports 360 photos and videos directly from the app, while TikTok favors shorter clips with eye-catching reframing.
Boost engagement by adding descriptive titles and tags. Schedule posts for peak times and interact with your audience in the comments. Always double check your uploads on each platform to confirm they display correctly. Sharing your evo content widely helps you connect with fans and other creators.
Troubleshooting common editing problems
Even experienced users run into issues with insta360 evo footage. Stitching errors and misaligned frames are common, especially in complex scenes. Use the software’s built-in stitching tools to correct these, and manually adjust if needed. Dealing with large files can slow down your workflow, so work on a fast drive and export in smaller sections if possible.
If you encounter export failures, check your export settings and available storage. Community forums and official support pages are great resources for finding solutions to specific problems. Regularly update your software to benefit from bug fixes and new features. Staying proactive with troubleshooting keeps your projects on track.
Essential editing tips from experienced creators
A smooth editing workflow is key for maximizing the potential of the insta360 evo. Use keyboard shortcuts and templates for repetitive tasks. Avoid over-editing, which can distract from the immersive experience. Save versions of your edits so you can revert if needed.
Study top creators for inspiration and new techniques. Join online groups to share your work and get feedback. Experiment with different styles, from cinematic vlogs to VR tours, to discover what resonates with your audience. With practice, you will develop a signature editing style that sets your evo content apart.
Troubleshooting and maintenance: Keeping your Evo in top shape
Maintaining your insta360 evo is essential for consistent performance and longevity. Over years of fieldwork, I have learned that a few proactive habits can prevent most headaches. Let us walk through the key maintenance and troubleshooting steps that every creator should master.
Common hardware and software issues
Every camera has its quirks, and the insta360 evo is no exception. Sometimes, the camera may not power on, or you might experience unexpected freezes during long shoots. Connectivity drops with the app or random crashes can disrupt your workflow.
To minimize these issues, make sure your batteries are fully charged and your memory card is formatted correctly. If the insta360 evo freezes, a quick reset by holding the power button usually resolves it. Persistent problems often point to outdated firmware or incompatible memory cards.
Cleaning and caring for lenses
Crystal clear lenses are vital for immersive 360 and 3D footage. I always use a soft microfiber cloth and a dedicated lens cleaning solution for my insta360 evo. Avoid using rough fabrics or paper, as these can leave scratches.
Keep a small lens brush handy to remove dust before wiping. Store the camera in a protective case when not in use to prevent accidental smudges and scratches. Regular cleaning keeps footage sharp and helps protect your investment.
Storage and battery life optimization
Efficient storage and power management go a long way with the insta360 evo. Always use high-speed, reputable memory cards to avoid recording errors. Regularly transfer and back up your files to clear space and reduce the risk of data loss.
For battery longevity, avoid letting the battery fully drain before recharging. Store the insta360 evo and spare batteries in a cool, dry place. If you encounter storage errors, reformat the memory card in-camera and check it for faults.
Firmware updates and support resources
Keeping your insta360 evo up to date is crucial for smooth operation. Check for firmware updates through the official app or settings menu. Updates often fix bugs and add new features. If you run into trouble, the official documentation and support forums are a great starting point.
For detailed technical specs and troubleshooting, I highly recommend reviewing the Insta360 Evo specifications page. Community forums also offer practical solutions from other users, which can be invaluable when facing uncommon issues.
When to seek professional repair
Most problems with the insta360 evo can be solved at home, but some require a professional touch. If you notice persistent hardware failures, visible lens damage, or charging issues that do not resolve with basic troubleshooting, it is time to contact support.
Check your warranty coverage before attempting any repairs yourself. Authorized service centers can handle complex fixes and ensure your camera remains in top condition. Many creators share positive experiences with official repairs, citing quick turnaround and quality service. Regular maintenance and prompt attention to issues will keep your insta360 evo ready for every adventure.
Pro tips and creative inspiration for Evo users
Unlocking the full creative power of the insta360 evo is about more than just technical skill. It is about seeing the world with fresh eyes, telling stories in new ways, and leveraging every tool and resource at your disposal. The following pro tips and inspiration are drawn from years of hands-on experience, countless shoots, and a deep passion for immersive content creation.
Shooting for storytelling: Engaging your audience
Great immersive content always starts with a clear narrative. With the insta360 evo, I recommend mapping out your story before you even hit record. Think about how viewers will move through your 360 or 3D scene. Use movement intentionally, like walking through a location or panning slowly to reveal surprises. Transitions between scenes can be made seamless by planning your camera placements and movements carefully.
Some of my favorite examples involve capturing a journey, such as a city walk or a hike, using the insta360 evo to place the audience right alongside me. I find that using natural audio and ambient sounds helps ground the viewer in the experience, making the story much more engaging.
Advanced camera settings for unique looks
Mastering manual controls elevates your content from simple to cinematic. With the insta360 evo, tweaking exposure, ISO, and white balance lets you adapt to any lighting situation. I often shoot in manual mode when the lighting is tricky or when I want a specific mood. Experimenting with LUTs and filters can dramatically change the look and feel of your footage.
For creators interested in the latest editing innovations, frameworks like Edit360: 2D to 3D asset editing show how you can extend your creative vision from flat images to immersive 3D assets, opening up even more possibilities for the insta360 evo. Always keep experimenting, as unique color grading and aspect ratios set your work apart.
Integrating Evo into a multi-camera workflow
Blending insta360 evo footage with traditional cameras can add depth and variety to your projects. I usually sync my clips using a visible hand clap or audio spike across all devices. Mixing 360 or 3D shots with regular video keeps viewers engaged and offers context. The challenge is matching exposure and color profiles, but with careful planning and software like Insta360 Studio, it becomes manageable.
One tip is to use the insta360 evo for establishing shots or immersive close-ups, then cut to standard footage for details. This approach creates a dynamic visual narrative that feels both immersive and familiar.
Essential accessories for serious creators
To get the most out of the insta360 evo, investing in high quality accessories is key. Here is a quick table of my top recommendations:
| Accessory | Use Case | Pro Tip |
|---|---|---|
| Invisible Selfie Stick | Dynamic 360 shots | Keep it out of frame for magic |
| External Mic | Pro audio for vlogs | Use windscreen outdoors |
| Rugged Case | Travel and adventure | Protect lenses at all times |
| Tripod | Static 3D captures | Go for lightweight, sturdy |
Handheld shooting works for quick moments, but for professional content, I always use a tripod or mount. The right accessories extend the creative range of the insta360 evo and protect your investment.
Staying inspired: Resources and communities
The world of 360 and 3D storytelling is evolving rapidly, and staying inspired is crucial. I recommend joining online forums and groups dedicated to the insta360 evo, where you can share your work and get valuable feedback. Social media platforms are great for following top creators and tracking emerging trends.