
Cinematic storytelling is more popular than ever, and with the demand for high-quality video on the rise, creators are seeking portable tools that deliver professional results. The DJI Pocket 2 stands out in this landscape, transforming the way we capture stunning footage with a device that fits in your pocket.
This guide is crafted for anyone aiming to master the dji pocket 2 in 2026, from first setup to advanced cinematic techniques. Inside, you will find an in-depth look at the camera’s latest features, essential accessories, step-by-step shooting strategies, editing workflows, and creative inspiration.
Whether you are a travel vlogger, filmmaker, or content creator, this handbook will help you unlock the full cinematic potential of your dji pocket 2. Dive in and discover how to elevate your visual storytelling with confidence.
Contents
- Getting to know the DJI Pocket 2 in 2026
- Setting up for cinematic success: Preparation and essential accessories
- Mastering camera settings for cinematic shots
- Step-by-step guide to capturing cinematic footage
- Advanced techniques for next-level cinematic visuals
- Post-production workflow: Editing and sharing your cinematic creations
Getting to know the DJI Pocket 2 in 2026
The landscape of compact video gear has transformed dramatically, yet the dji pocket 2 remains a favorite for creators seeking cinematic results with minimal fuss. What keeps it relevant in 2026 is its rare balance of portability, powerful stabilization, and ease of use. Over the years, firmware updates have refined its performance, helping it stand out even as new competitors enter the market.
Let’s talk about the technical side. The dji pocket 2 features a 1/1.7-inch sensor that captures vibrant detail, even in tricky lighting. Its 3-axis gimbal stabilization delivers smooth footage, which is essential for handheld shooting. In 2026, users can record in 4K at up to 60fps, or drop to 2.7K and 1080p for longer recording times and smaller file sizes. Battery life averages 140 minutes per charge, which is more than enough for a day’s adventure. The compact build, weighing just 117 grams, means it slips easily into any bag or pocket.
What sets the dji pocket 2 apart is how it merges professional-grade stabilization with an interface that anyone can master. Whether you are a vlogger, traveler, or filmmaker, the intuitive controls and lightweight design make it a go-to choice. Compared to smartphones, which have improved their video capabilities, the Pocket 2’s physical gimbal still provides superior motion smoothness. If you check out the Best vlogging camera options, you will see how the dji pocket 2 stacks up against the latest compact gimbal cameras.
A quick comparison:
| Feature | DJI Pocket 2 | Compact Gimbal Cam X | Flagship Smartphone 2026 |
|---|---|---|---|
| Sensor Size | 1/1.7-inch | 1/2-inch | 1/1.3-inch |
| Max Video Resolution | 4K 60fps | 4K 30fps | 8K 30fps |
| Stabilization | 3-axis gimbal | 2-axis gimbal | EIS/OIS only |
| Weight | 117g | 150g | 210g |
| Battery Life | 140 min | 100 min | 90 min |
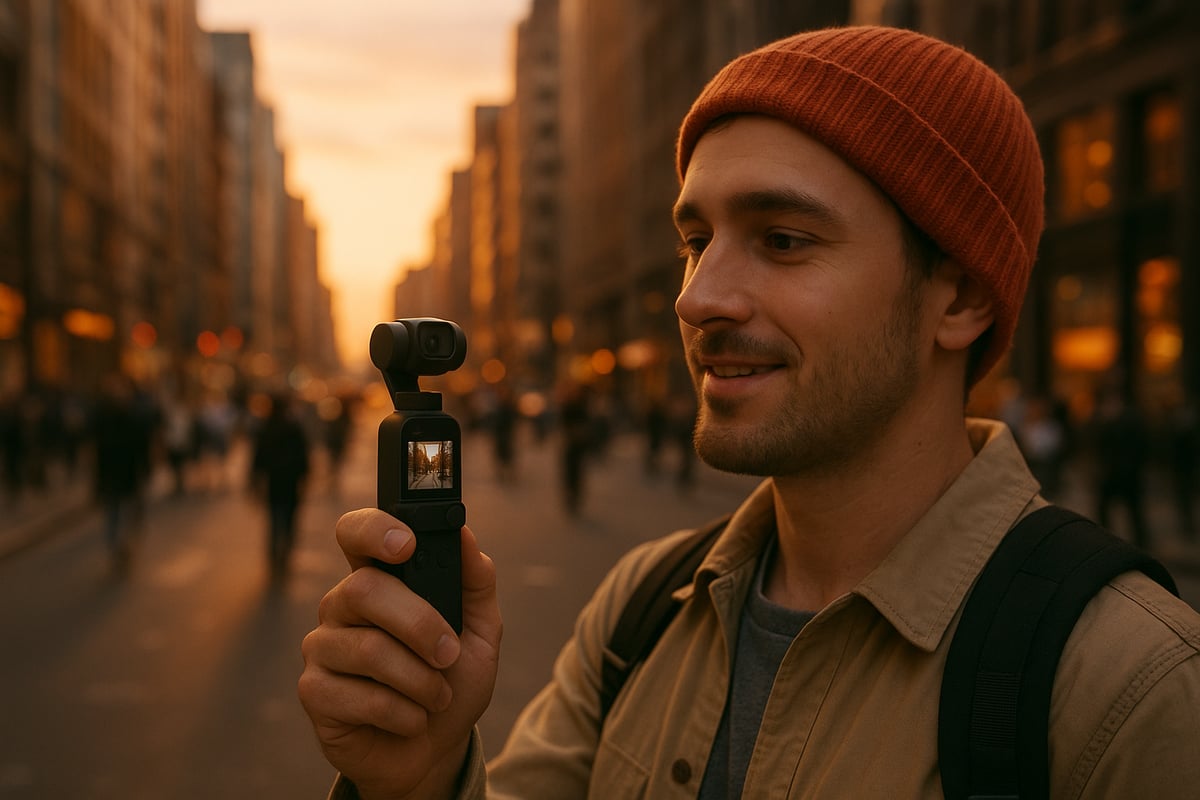
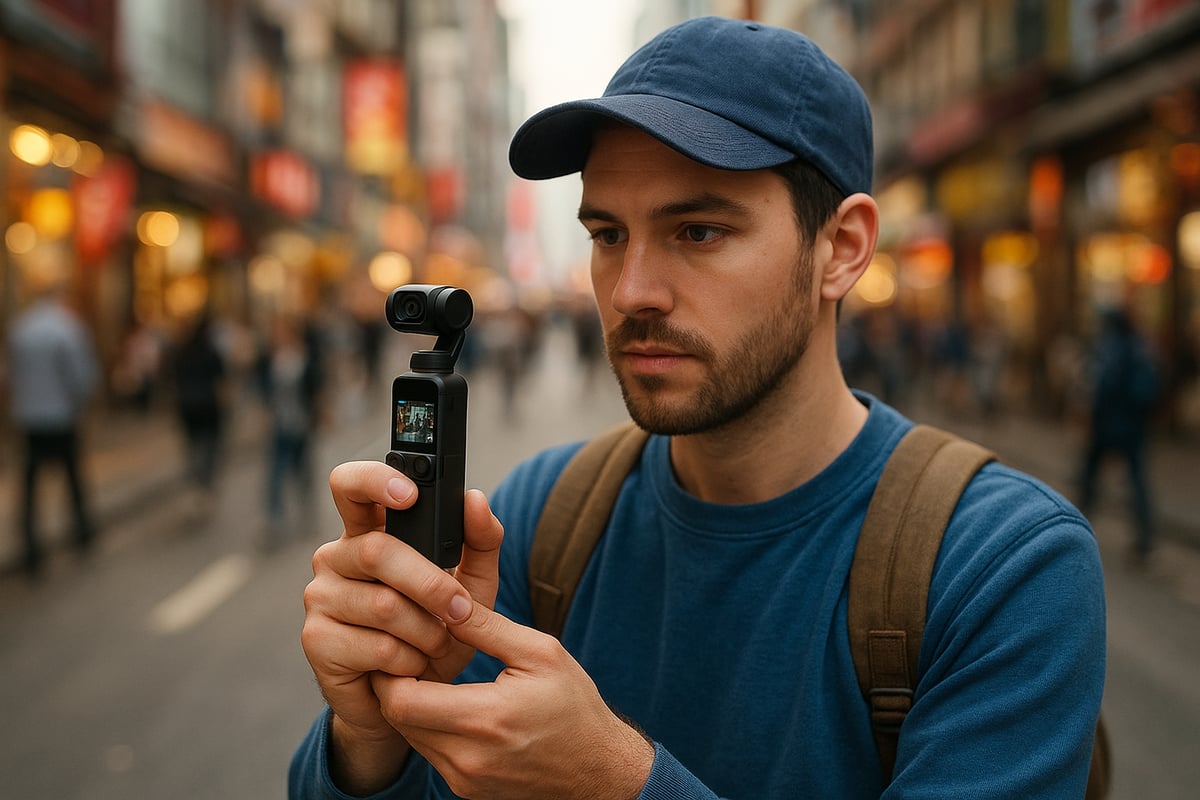
The dji pocket 2 appeals to a wide demographic. Vloggers love the convenience and stabilized shots on the move. Travelers appreciate its small size and discreet profile, perfect for candid moments. Content creators and indie filmmakers use it as a B-cam for dynamic sequences. I have seen travel vloggers shoot entire daily stories with just the dji pocket 2, capturing everything from bustling markets to tranquil sunsets, all with a cinematic sheen.
Since 2020, the dji pocket 2 has received several firmware updates, including improved autofocus, enhanced ActiveTrack, and new creative shooting modes. These updates have kept it competitive and user-friendly. In 2026, compact gimbal cameras hold around 18 percent of the vlogging and travel camera market, with the dji pocket 2 still leading the segment for solo creators and on-the-go filmmakers.
Despite the arrival of newer models, the dji pocket 2’s blend of portability, stabilization, and versatility makes it a smart investment for anyone serious about cinematic content creation.
Setting up for cinematic success: Preparation and essential accessories
Preparing your gear is the first step to unlocking the full potential of the dji pocket 2. A thoughtful setup ensures every cinematic shoot starts smoothly, letting you focus on your creative vision rather than technical hiccups. Whether you are new to compact gimbals or a seasoned traveler, these steps and tools set you up for success.
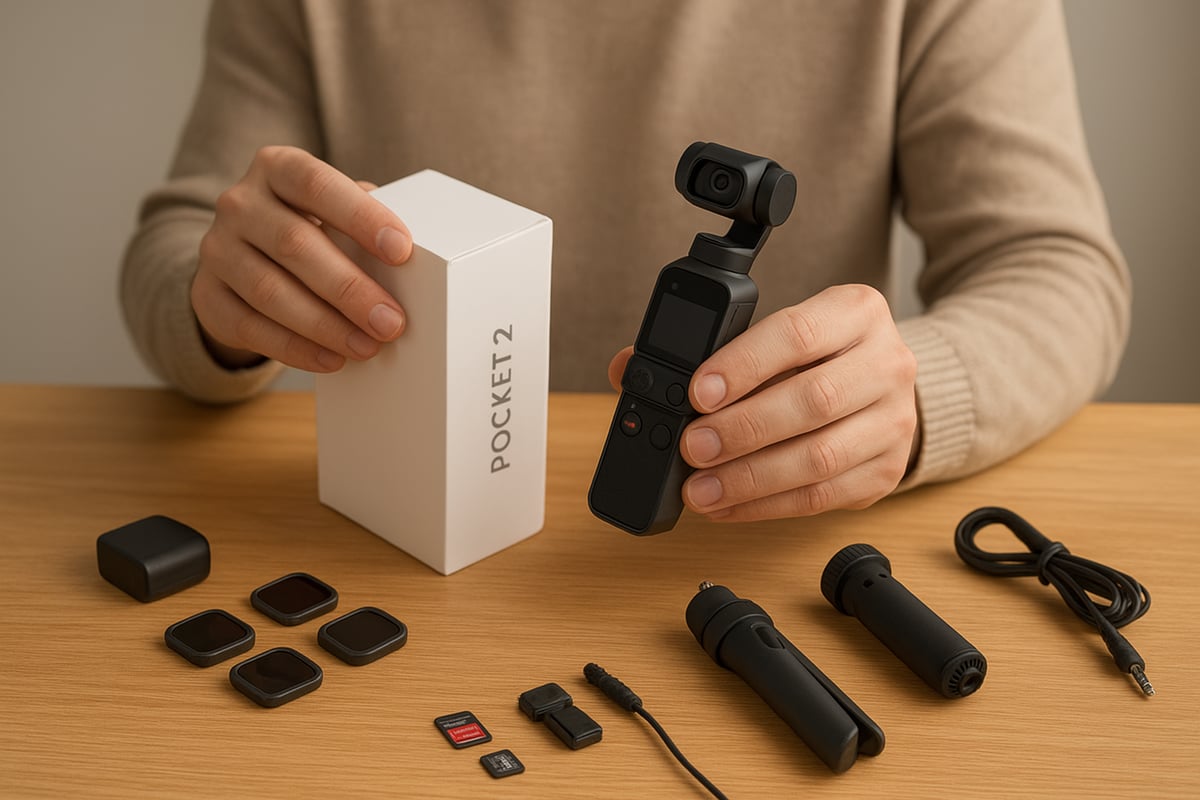
Unboxing and initial setup
Opening the dji pocket 2 box always sparks excitement. Start by carefully removing each component and confirming that all included items are present. Before powering up, fully charge the device using the supplied USB-C cable. This not only protects battery health but ensures you are ready for firmware updates.
Once charged, power on the dji pocket 2 and follow the prompts to connect it to the DJI Mimo app. This connection is crucial for syncing settings, downloading updates, and unlocking advanced features. Let the app guide you through firmware installation and initial gimbal calibration, which ensures smooth stabilization from the start.
A common mistake I see is skipping the calibration step, especially when eager to shoot on location. This can lead to uneven footage or gimbal errors. Always calibrate on a flat surface and avoid moving the device during the process. Take a moment to familiarize yourself with the Mimo app layout, as it becomes your control center for most advanced functions.
Must-have accessories for 2026
To elevate the dji pocket 2 experience, the right accessories make a world of difference. Here are my essentials for 2026:
- External microphones and adapters: Built-in mics are decent but can struggle in windy or busy environments. A compact shotgun mic or wireless lavalier setup, paired with the official audio adapter, delivers crisp, professional audio.
- ND filters: These are game-changers for outdoor shooting. By controlling light exposure, ND filters help you maintain cinematic shutter speeds even in bright conditions. For instance, sliding on an ND16 filter during a sunny hike let me capture buttery smooth motion without overexposure.
- Mounts, tripods, and extension rods: A sturdy mini tripod keeps your dji pocket 2 steady for timelapses or static shots. Extension rods allow for creative overhead or low angle perspectives, which add depth to your storytelling.
- Storage solutions: High-bitrate 4K video demands fast, reliable memory cards. I always recommend checking the best memory cards for your camera to ensure smooth recording and quick file transfers.
- Carrying cases and weather protection: A padded case shields the dji pocket 2 from bumps and dust, while a weatherproof pouch keeps it safe during unpredictable shoots.
When assembling your kit, prioritize accessories based on your shooting style. For frequent travelers, lightweight and multifunctional gear is key. ND filters, in particular, can transform harsh midday sun into cinematic, balanced footage, letting colors pop and motion look natural.
Maintenance and troubleshooting tips
Keeping your dji pocket 2 in peak condition extends its life and ensures every shoot meets your standards. Regularly clean the lens with a microfiber cloth to avoid smudges that can ruin footage. Gently wipe the gimbal motors to remove dust, especially after outdoor adventures.
Battery care is essential. Avoid letting the battery drain completely and try to store the dji pocket 2 at around 50 percent charge for long periods. This preserves battery health and readiness for spontaneous shoots.
In 2026, a few common issues persist, like connectivity hiccups or gimbal calibration errors after travel. If you encounter a calibration error, place the dji pocket 2 on a flat, stable surface and run the calibration process through the Mimo app. Most issues resolve with a quick reset or firmware refresh.
By staying proactive with cleaning and battery habits, and knowing how to troubleshoot on the go, you keep your dji pocket 2 ready for every cinematic opportunity.
Mastering camera settings for cinematic shots
Understanding the camera settings of the dji pocket 2 is essential for capturing truly cinematic footage. With the right combination of video modes, manual controls, and gimbal tricks, you can elevate your visuals to professional standards. Let’s break down each element so you can unlock the camera’s full potential.
Understanding video modes and resolutions
Selecting the right video mode on the dji pocket 2 can dramatically change the look and feel of your footage. In 2026, the camera still offers a robust set of resolutions, including 4K, 2.7K, and 1080p, each supporting various frame rates for different creative needs.
Here’s a quick comparison table:
| Resolution | Max Frame Rate | Best Use Case |
|---|---|---|
| 4K | 60fps | High detail, cinematic b-roll |
| 2.7K | 60fps | Balanced quality/performance |
| 1080p | 120fps | Slow motion, action shots |
For cinematic projects, 4K at 24fps is the gold standard, delivering rich detail and that classic filmic motion. When capturing fast-moving scenes, like sports or street action, 60fps or even 120fps in 1080p can help you create smooth slow-motion sequences.
I often switch between 4K at 24fps for establishing shots and 1080p at higher frame rates when I want to emphasize movement. The dji pocket 2 handles these transitions seamlessly, ensuring you don’t miss a moment of creative opportunity.
Choosing the right resolution comes down to your story. For atmospheric b-roll, stick with 4K for maximum clarity. If you’re filming action, 1080p at high frame rates lets you slow down time and highlight every detail. The flexibility of the dji pocket 2 means you can adapt quickly while out in the field.
Manual controls: Exposure, ISO, and white balance
Unlocking the full power of the dji pocket 2 requires stepping into Pro mode. Here, you can manually adjust exposure, ISO, and white balance, giving you total control over your image.
Start with exposure. I recommend keeping your shutter speed at double your frame rate (for example, 1/50s for 24fps) to maintain natural motion blur. Set your ISO as low as possible to minimize noise, especially in bright conditions. Indoors or at dusk, push ISO only as much as needed to avoid grainy footage.
White balance is another critical setting. The dji pocket 2’s auto white balance is decent, but I always lock it in Pro mode to avoid color shifts between shots. Use daylight or cloudy presets outdoors, and custom Kelvin values for tricky lighting.
Shooting at golden hour? Lower your ISO, slightly underexpose, and set your white balance to 5200K for warm, cinematic tones. These tweaks ensure your footage stands out in any environment.
For more on dialing in perfect settings, I often refer to this DJI Pocket 2 Cinematic Camera Settings guide, which offers practical tips tailored for real-world shooting.
Gimbal modes and stabilization tricks
The gimbal on the dji pocket 2 is what gives your shots that buttery smooth, cinematic look. Understanding its modes unlocks a new level of creative control.
Here’s a quick rundown:
- Follow mode: Gimbal follows pan and tilt for natural movement.
- Tilt Lock: Locks tilt, only pans with your hand, great for horizontal tracking.
- FPV mode: Adds roll for immersive, dynamic shots.
- ActiveTrack: Automatically tracks your subject, perfect for vlogging or action.
When I film dynamic subjects, I rely on ActiveTrack to keep them perfectly framed. For smooth pans and cinematic reveals, Tilt Lock delivers that professional touch. If you want to avoid micro-jitters, walk heel-to-toe and use two hands for extra stability. The dji pocket 2’s gimbal will do most of the heavy lifting, but your technique still matters.
My top tips for stabilization:
- Plan your moves, don’t rush.
- Use the joystick for subtle tilts and pans.
- Avoid abrupt direction changes.
By mastering these modes and techniques, you’ll consistently capture footage that looks like it was shot on a much larger rig. The dji pocket 2 truly makes high-end visuals accessible to anyone willing to dive into its settings.
Step-by-step guide to capturing cinematic footage
Unlocking the full cinematic potential of the dji pocket 2 requires more than just pressing record. It starts with thoughtful planning, continues with precise setup and camera adjustments, and thrives on creative shooting techniques. This section walks you through each phase, sharing hands-on advice to help your footage stand out in 2026.
Planning your cinematic shot
Every memorable film starts with a vision. Before you even power on the dji pocket 2, brainstorm the story you want to tell. I recommend sketching a quick storyboard or jotting down a shot list. Visualizing your sequence helps you anticipate transitions, camera moves, and the mood you wish to convey.
Scout your locations, both for aesthetics and practicality. Observe how the light changes throughout the day, especially if you aim for golden hour shots. Consider the weather, foot traffic, and potential distractions.
For example, when planning a travel montage, I map out sunrise and sunset spots, note background elements that add local flavor, and identify a few backup locations. By prepping in advance, you save time and can focus on capturing authentic moments with the dji pocket 2.
Step 1: Setting up your scene
With your plan in mind, set the stage. The dji pocket 2 thrives when you pay attention to composition. Frame your shot using the rule of thirds, and look for leading lines that draw the viewer’s eye into the scene.
Depth is your friend. Layer foreground elements, like a coffee cup or passing bike, to add dimension. Scan the background for distractions. A busy street can add energy, but a cluttered backdrop might steal focus from your subject.
A little patience here pays off. The right frame transforms an ordinary clip into a cinematic moment with the dji pocket 2.
Step 2: Optimizing camera and gimbal settings
Before you roll, double-check your dji pocket 2 settings. Switch to Pro mode for manual control over exposure, ISO, and white balance. Lock your focus on the main subject to avoid unwanted shifts mid-shot.
For slow motion or time-lapse, toggle the respective mode and ensure you have enough light. Stabilization is crucial, so select the right gimbal mode—Follow for smooth pans, Tilt Lock for steady horizons, or FPV for immersive motion.
Confirm settings on the DJI Mimo app, and do a quick test pan. Adjust until you achieve the look you want. The dji pocket 2 rewards careful setup with consistently smooth footage.
Step 3: Capturing movement and dynamic shots
Movement brings your story to life. With the dji pocket 2’s gimbal, you can achieve cinematic walking shots, sweeping reveals, or elegant push-ins. Hold the camera close to your body and walk heel-to-toe for maximum smoothness.
Experiment with the joystick for precise pans and tilts. ActiveTrack is a game-changer—tap your subject on the screen and let the camera follow, perfect for following a friend through a crowded street or capturing wildlife on the go.
If you want to see these techniques in action, I recommend the DJI Pocket 2 Cinematic Tutorial, which demonstrates real-world shooting scenarios. Dynamic shots with the dji pocket 2 can elevate ordinary moments, making your footage feel straight out of a movie.
Step 4: Recording audio for cinematic storytelling
Great visuals deserve great sound. The dji pocket 2 supports external microphones, so use a quality mic and a windshield to minimize wind noise. Before hitting record, monitor your audio levels in the DJI Mimo app.
Record a test clip and listen for background hums or unexpected noise. If you are shooting dialogue, keep your mic close to the subject. Clear audio can set your video apart, and with the dji pocket 2’s flexibility, you have the tools to achieve it.
Step 5: Reviewing and backing up footage
Once you wrap a scene, review your clips on the dji pocket 2’s screen or the Mimo app. Watch for focus errors, exposure issues, or accidental shakes. It is better to reshoot now than to discover a problem during editing.
Transfer your files promptly to your phone or computer. Use a fast microSD card reader for efficiency. Organize your footage by project and scene, and always keep a backup. The dji pocket 2 makes this process painless, helping you stay organized and ready for your next shoot.
Advanced techniques for next-level cinematic visuals
Unlocking the full potential of the dji pocket 2 comes down to mastering advanced techniques. Once you are comfortable with the basics, these next-level methods will elevate your visuals and storytelling. Let us dive into the practical steps and creative ideas that make cinematic footage truly stand out.
Creative gimbal moves and transitions
With the dji pocket 2, you have access to a suite of gimbal moves that once required bulky gear. The orbit shot, for instance, lets you circle your subject smoothly, creating dynamic energy. To execute it, keep your arms steady and walk slowly around your subject, using the joystick to adjust framing as you move.
Another favorite is the reveal shot. Frame a foreground object, then gently pan or move to unveil your main subject. This adds depth and suspense, perfect for transitions between scenes.
Push-in and pull-out moves are classics for drawing viewers into the story or pulling them back for context. Combine these with slow walking and the Pocket 2’s gimbal stabilization for seamless results.
Parallax shots are possible even in tight spaces. By moving the camera sideways while tracking a subject, you create a cinematic sense of separation between foreground and background. Many creators use these tricks for travel vlogs and short films.
If you are curious about how the dji pocket 2 compares with newer models in terms of creative moves, check out this DJI Osmo Pocket 3 review for perspective on what each camera offers.
Using ND filters and lens attachments
ND filters are a game changer for cinematic motion blur, especially in bright outdoor conditions. They work by reducing the amount of light entering the lens, allowing you to use slower shutter speeds. This is crucial for keeping movement smooth and natural in your dji pocket 2 videos.
There are different ND filter strengths, typically marked as ND4, ND8, ND16, and so on. Choose a higher number for brighter environments. For example, on a sunny day, ND16 is often ideal. Swapping filters is quick and easy, letting you adapt to changing light on the fly.
Specialty lens attachments, like wide-angle or macro lenses, extend the creative range of your dji pocket 2. A wide-angle lens is perfect for expansive landscapes, while a macro lens excels at capturing small subjects with crisp detail.
Color grading and picture profiles
Cinematic footage is not just about sharpness and movement, but also about color. The dji pocket 2 offers the D Cinelike profile, which records a flatter color image. This gives you more flexibility in post production to fine tune your look.
To get started, shoot in D Cinelike mode. In your editing software, begin with basic corrections: adjust contrast, lift shadows, and fine tune white balance. Then, apply a subtle color grade to match the mood of your story.
Here is a quick before and after:
| Step | Visual Impact |
|---|---|
| Original | Flat colors, less contrast |
| After Grading | Rich tones, cinematic depth |
If you ever need a refresher on the camera’s picture profiles and settings, refer to the DJI Pocket 2 User Manual for comprehensive guidance.
Many filmmakers use gentle teal and orange tones for travel films, but do not be afraid to experiment and find your signature look with the dji pocket 2.
Low-light and night shooting tips
Shooting in low light is where the dji pocket 2 can truly surprise you. Start by lowering your ISO as much as possible to avoid grain, and open up your shutter speed within reason for smooth results. Take advantage of available light sources—street lights, neon signs, or even a portable LED panel.
Try stabilizing your camera on a mini tripod for longer exposures. This reduces the risk of blur and maximizes sharpness. Cityscapes after dark, for example, come alive with reflections and glowing highlights using these techniques.
With practice, you will find that the dji pocket 2 can capture the atmosphere of night scenes, making your visuals as cinematic after sunset as they are in daylight.
Post-production workflow: Editing and sharing your cinematic creations
Turning your raw footage into a cinematic masterpiece is where the true magic of the dji pocket 2 comes alive. A thoughtful post-production workflow can elevate even the simplest clips. Whether you are a beginner or a seasoned creator, mastering this process ensures your work stands out.
Importing and organizing footage
Efficient file management begins the moment you finish recording. Always back up your footage from the dji pocket 2 immediately to avoid accidental loss. Use a structured folder system, such as separating by project, date, or location. This habit saves time and frustration during editing.
When transferring files, use high-speed card readers to maintain the integrity of your high-bitrate videos. Reliable microSD cards also help prevent file corruption. If you encounter compatibility or transfer issues, consult the DJI Pocket 2 Support Page for official troubleshooting advice.
Choosing the right editing software matters. Here is a quick comparison:
| Software | Platform | Key Features |
|---|---|---|
| Adobe Premiere | Windows/Mac | Advanced, flexible |
| DaVinci Resolve | Windows/Mac | Free, robust color tools |
| LumaFusion | iOS | Mobile, intuitive |
Once your files are organized, you are ready to shape your cinematic vision.
Basic editing techniques for cinematic polish
Editing is where the story comes together. Start by reviewing your dji pocket 2 footage and selecting the best takes. Trim unnecessary segments, arrange the clips for narrative flow, and use simple transitions to maintain visual interest.
Add music and sound effects to enhance mood. For dramatic sequences, experiment with speed ramping and slow-motion features—these are especially powerful with the high frame rates the dji pocket 2 offers. Adjust audio levels, ensuring dialogue and ambient sound remain clear.
A few quick tips:
- Use color grading to match your shots.
- Overlay text or titles sparingly for a professional touch.
- Preview your edits on various devices to check consistency.
Refining these details transforms ordinary clips into cinematic stories.
Exporting and sharing in 2026
After editing, exporting your video with optimal settings is vital. For YouTube, set resolution to 4K or 2.7K, keeping bitrate high for crisp visuals. Instagram and TikTok favor vertical formats, so adjust the aspect ratio accordingly before exporting from the dji pocket 2 files.
Many creators prefer to share directly from the DJI Mimo app for convenience. However, always check your final output for compression artifacts and color accuracy. If you run into export or upload issues, revisit the DJI Pocket 2 Support Page for updated solutions.
Remember, every platform has unique requirements. Taking a few extra minutes to tailor your exports ensures your dji pocket 2 footage looks its best wherever you share it.


