


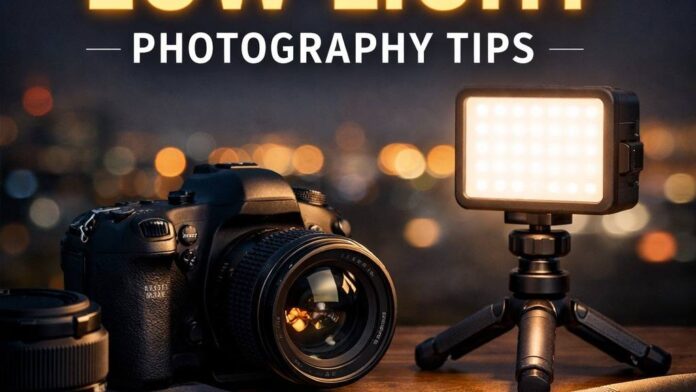
Why low light is challenging and what changes first
Every photographer faces a learning curve when the sun goes down or you step into a dimly lit space. The simple reason: cameras need light to form a clean, sharp image. When light drops, your sensor has to make do with less, which leads to a chain reaction throughout the exposure triangle – aperture, shutter speed, and ISO.
First, shutter speeds need to slow down to let in more light. This is risky if you are handholding, as even the smallest movement can blur your shot. Next, you may need to open your aperture wider. This lets in more light, but also reduces depth of field, which can make focusing tricky. Finally, as a last resort, you crank up the ISO. This adds sensitivity but also brings digital noise, which can strip away detail and muddy your colors.
Low light photography forces you to make trade-offs. Do you accept more blur, less depth of field, or more grain? The best low light photography tips come from understanding these trade-offs and knowing which to compromise first, depending on your subject and intent. Often, it is about deciding what matters most: sharpness, atmosphere, or clean tones.
Another challenge is autofocus accuracy. In low light, many cameras struggle to lock on. You may also struggle to judge focus manually, especially with older optical viewfinders or if your eyes are tired. Add in the risk of camera shake, and there is a lot working against you. However, with practice and a few technical adjustments, you can consistently produce strong images in challenging lighting.
Today’s cameras, including the new compact digital cameras making a comeback in 2026, handle low light much better than older models. But the fundamentals remain the same. Knowing when to rely on gear and when to trust technique is key.
Dial in the camera settings that matter most
Getting your camera settings right is the foundation of all low light photography tips. The goal is to balance enough exposure for a clean image with as little noise and blur as possible. This takes practice, but with a systematic approach, it becomes second nature.
How to balance shutter speed aperture and ISO
Start with shutter speed. If you are shooting handheld, keep it at or above the reciprocal of your focal length. For example, with a 50mm lens, aim for 1/60 second or faster. If your subject is moving, use even faster speeds to freeze motion. When light is low, you may need to slow your shutter, but only as much as your stability allows.
Next, open your aperture as wide as your lens allows (lower f-number). Fast prime lenses, such as f/1.8 or f/1.4, are excellent for this. However, remember that a wide aperture reduces depth of field. Focus carefully, especially for portraits or close-ups where even a small miss is noticeable.
Finally, raise the ISO as needed. Modern sensors can handle higher ISO values, often up to 3200 or even 6400 with good results. Still, noise increases with ISO, especially in shadows. I prefer to use only as much ISO as required. If you plan to edit your RAW files, you can often clean up a bit of noise later.
The ideal settings often look like this:
- Shutter speed: as fast as possible without underexposing or causing blur
- Aperture: as wide as the scene allows for your desired depth of field
- ISO: only as high as needed, usually the last adjustment
Always check your histogram and review images at 100 percent zoom to catch issues early.
When to shoot RAW and use exposure compensation
Shooting RAW is one of the best camera settings for low light. RAW files capture more detail and dynamic range than JPEG, which is vital when working with tricky exposures. They also handle heavy editing better, allowing you to recover shadows or reduce noise without degrading the image.
Exposure compensation is another powerful tool. If you notice your camera is underexposing a dark scene, dial in +1 or +2 stops of exposure compensation. This ensures your shadows are not crushed, giving you more flexibility during editing. Conversely, if you risk blowing out highlights (such as with streetlights), use negative compensation.
For scenes with mixed lighting, bracket your exposures if your subject is not moving. This gives you options later. And always double-check your settings when light changes rapidly, such as at sunset or indoors with changing artificial light.
Keep your shots sharp when light is limited
After exposure, sharpness is the next big hurdle in low light photography. Movement from your hands or your subject can quickly ruin a shot. The following techniques help you keep images crisp, even when the light drops.
Handheld techniques that reduce camera shake
Stability starts with your stance. Tuck your elbows in, press the camera gently to your face, and control your breathing. Squeeze the shutter release smoothly rather than jabbing at it. If possible, brace yourself against a wall or a stable object. These small adjustments make a big difference, especially with slower shutter speed in low light.
Use burst mode for critical moments. Taking several shots in quick succession increases your chances of one sharp frame. Many mirrorless and compact cameras now have electronic shutters, which reduce mechanical vibration and help in low light.
When a tripod monopod or image stabilization helps
If you plan to shoot stationary subjects, a tripod is your best friend. Even a small travel tripod or tabletop model can help. For more flexibility, a monopod can be enough to steady your camera without adding much bulk.
Many modern lenses and cameras have built-in image stabilization. This technology lets you shoot at slower shutter speeds without visible blur. When using image stabilization, remember to turn it off if your camera is mounted on a tripod, as it can sometimes introduce its own movement.
If a tripod is not practical, look for firm surfaces to rest your camera on – a table, a railing, or even your camera bag. Using a two-second timer or a remote release will prevent shake from pressing the shutter.
For more on getting sharp photos in low light, see our guide to the best cameras for night photography.
Focus accurately in dark scenes
One of the most frustrating parts of shooting in low light is getting the focus right. Most autofocus systems rely on contrast, which can be hard to detect in the dark. Sometimes, autofocus will hunt or fail completely.
If your camera struggles to find focus, switch to a single focus point and place it over the area of highest contrast or a bright edge. Avoid using all focus points or wide-area modes, as these will often miss in the dark.
For stubborn scenes, use a small flashlight or your phone screen to add temporary light for focusing, then switch it off before taking the shot. If autofocus still cannot lock, do not be afraid to use manual focus. Many mirrorless cameras offer focus peaking or magnified live view, making it much easier to focus by hand.
For night photography or low light portraits, pre-focus on a spot where you know your subject will be. If you are shooting a street scene, wait for your subject to walk into the zone of sharp focus.
Consistent practice with both autofocus and manual focus in challenging light will make you much faster and more confident.
Use available light creatively instead of fighting it
One of the most rewarding low light photography tips I’ve learned is to work with the light you have, not against it. Artificial flashes and harsh LED panels can flatten a scene or kill its atmosphere. Instead, learn to see the beauty in available light sources and use them to shape your images. Whether you’re shooting indoors, on the streets at night, or in a moody café, available light can add drama and storytelling depth that artificial lighting rarely matches.
How to work with window light, streetlights, and practicals
Window light photography is a classic for a reason. Even in a dim room, a single window can provide soft, directional light that flatters skin tones and brings out textures. Position your subject close to the window and let the light fall across their face at an angle. This creates natural highlights and shadows, giving your images depth. If the light is harsh, use a sheer curtain or a white bedsheet as a diffuser. For a moodier look, turn off overhead lights and embrace the contrast between the bright window and the surrounding shadows.
For street photography in low light, pay attention to small pockets of illumination. Streetlights, neon signs, and car headlights all create pools of light that can isolate your subject or add interesting color casts. Don’t be afraid to raise your ISO or use a fast lens. The grain from higher ISO settings can even enhance the atmosphere of night scenes. Look for reflections in puddles or glass, and use them to add layers to your composition. In city scenes, let traffic lights or glowing shop windows act as backdrops. Sometimes, the most compelling images come from scenes where light is scarce but meaningful.
Practical lights – objects that naturally belong in the scene, such as desk lamps or candles – are powerful storytelling tools. For example, in a dim bar, let the glow from a table lamp illuminate faces, or use a string of holiday lights to frame a portrait. Move yourself and your subject until the practical light falls just right. Trust your eye and resist the urge to “correct” every shadow. Shadows in low light photography are not flaws. They are part of what makes these images feel alive and real.
Ultimately, available light photography is about observation and patience. Take time to walk around your scene and notice how the light behaves. Try different angles and exposures. Some of my favorite images were captured by simply watching how a shaft of light moved across a wall or waiting for a subject to step into the perfect patch of illumination. Don’t fight the darkness – let it work for you.
Choose the right gear without overcomplicating your kit
Many photographers believe low light photography requires expensive, complicated gear. In reality, you can achieve excellent results with a simple setup if you choose wisely. The key is to focus on the essentials – lenses, bodies, and a few accessories that suit your style – rather than chasing after the biggest or newest camera.
Best lenses and accessories for low light shooting
If you’re asking yourself about the best lens for low light photography, start with a fast prime lens. Lenses with wide apertures (f/1.4, f/1.8, or f/2) allow much more light to hit your sensor, making it easier to shoot handheld and keep your ISO lower. A 35mm or 50mm prime is lightweight, sharp, and ideal for both portraits and street scenes. Fast primes also give you beautiful background blur, which helps your subject stand out even in visually busy environments.
For those who prefer zooms, look for lenses with a constant wide aperture, like f/2.8. While not as bright as primes, these offer flexibility for events and travel. If you use a compact digital camera, many recent models perform surprisingly well in low light, especially those with larger sensors and fast lenses. Compact cameras are making a comeback in 2026 due to their portability and improved low light performance, so don’t overlook them if you want to travel light.
- Tripod or monopod: Even a small travel tripod can help you shoot at slower shutter speeds without blur. For street work, try bracing your camera against a wall or railing instead of carrying extra gear.
- Remote or self-timer: Reduces vibration when pressing the shutter button, especially during long exposures.
- Spare batteries: Long exposures and cold nights drain batteries faster. Bring extras to avoid frustration.
Resist the urge to fill your bag with every accessory. Instead, know your camera’s strengths and limitations. Practice with your gear in different lighting conditions so you can react quickly when the moment comes. A pared-down kit not only keeps you nimble, but also helps you focus on composition and timing rather than technical distractions.
For more gear ideas and real-world advice, check out the photography working low light tips shared by experienced shooters. Real-world experience matters more than any spec sheet.
Edit low light images for clean natural results
Shooting is only half the challenge in low light photography. Careful editing brings out detail, tames noise, and preserves the mood you saw in person. The goal is to create images that look clean and natural – not plastic or overprocessed. Here are some practical tips to edit low light photos for the best results:
- Shoot RAW: RAW files hold more information, making it easier to recover shadow detail and adjust white balance without destroying image quality.
- Reduce noise in photos selectively: Use your editing software’s noise reduction tool, but apply it gently. Overdoing noise reduction can smear skin textures and fine detail. Mask the effect so it only targets the shadow areas or background, leaving faces and key features sharp.
- Boost contrast and clarity: Low light images can look flat out of camera. Adding a touch of contrast and clarity helps shapes pop and recreates the mood you remember. Be careful not to clip highlights or crush shadows.
- Warm up the white balance: Tungsten bulbs or city lights often cast a yellow or orange hue. Instead of correcting all the color, sometimes it’s better to embrace the warmth for atmosphere. If you do want neutral tones, adjust white balance slowly and check skin tones for realism.
- Sharpen last: After resizing and noise reduction, apply a small amount of sharpening to bring back crispness. Focus on the subject’s eyes or main point of interest.
Different scenes require different approaches. Night cityscapes might benefit from a little extra saturation to make colors stand out, while a moody indoor portrait might look best with soft contrast and preserved shadows. Trust your memory – edit to match the feel you experienced on location rather than chasing a generic “clean” look.
By combining smart in-camera technique with thoughtful editing, you can create low light images that are both sharp and full of character. Don’t be afraid of a little grain or darkness; these elements can add to your photo’s authenticity and mood.
Key takeaways
- Prioritize shutter speed, aperture, and ISO together instead of changing one setting in isolation.
- Sharp low light images usually come from better stability and focus technique, not just higher ISO.
- Available light often looks more natural and atmospheric than adding too much artificial light.
- A fast lens, RAW files, and careful editing will improve low light results more than a complicated gear setup.
Frequently asked questions
What is the best ISO for low light photography?
The best ISO depends on your camera and the scene. Start at the lowest ISO that allows a fast enough shutter speed to avoid blur – often ISO 800 to 3200 on modern cameras. Newer sensors handle higher ISOs with less noise. Always expose as bright as possible without blowing highlights, then fine-tune in post.
How do I take sharp pictures in low light without a tripod?
Use a fast lens (wide aperture), increase ISO as needed, and keep your shutter speed above 1/your focal length (for example, 1/50s with a 50mm lens). Brace your hands or elbows against a solid object, control your breathing, and shoot in bursts. Some cameras and lenses offer image stabilization, which helps too.
Should I use autofocus or manual focus in low light?
It depends on the situation. In very dark scenes, autofocus might hunt or fail, so switch to manual focus and use your camera’s magnified live view or focus peaking. For street or event photography with moving subjects, use single-point autofocus and aim for areas with the most contrast.
What lens is best for low light photography?
A fast prime lens (f/1.4, f/1.8, or f/2) is ideal thanks to its wide aperture and sharpness. Popular choices include 35mm and 50mm primes. For versatility, a constant aperture zoom (f/2.8) works well. Don’t overlook recent compact digital cameras with fast built-in lenses, which are making a comeback and perform surprisingly well in low light conditions.