
You don’t need to spend thousands of dollars to build a respectable lens collection. That’s something I learned early in my photography journey, and it’s a lesson that still holds true in 2026. While premium glass from Canon, Nikon, and Sony certainly has its place, the gap between expensive and cheap lenses has narrowed dramatically over the past few years. Third-party manufacturers have stepped up their game, and even first-party budget options now deliver image quality that would have been unthinkable at these price points a decade ago. The cheapest camera lenses on the market today can produce stunning images in the right hands, and understanding which ones offer the best value is essential for anyone building their photography toolkit without emptying their wallet.
Contents
- Understanding what makes budget lenses worth your money
- Prime lenses offer the best value for budget-conscious photographers
- Zoom lenses that don’t sacrifice too much quality
- Specialty lenses that break the budget barrier
- How to evaluate budget lenses before buying
- Matching lenses to your actual shooting needs
- Long-term value and upgrade paths
- The reality of image quality differences
- Accessories that maximize budget lens performance
- Making the most of aperture limitations
- Real-world performance from affordable options
- Building a complete lens kit affordably
- Final considerations before purchasing
Understanding what makes budget lenses worth your money
Price tags don’t tell the whole story when it comes to lens quality. I’ve shot with $200 lenses that outperformed $2,000 options in specific scenarios, and the reverse is also true. The key is understanding what you’re actually getting at different price points.
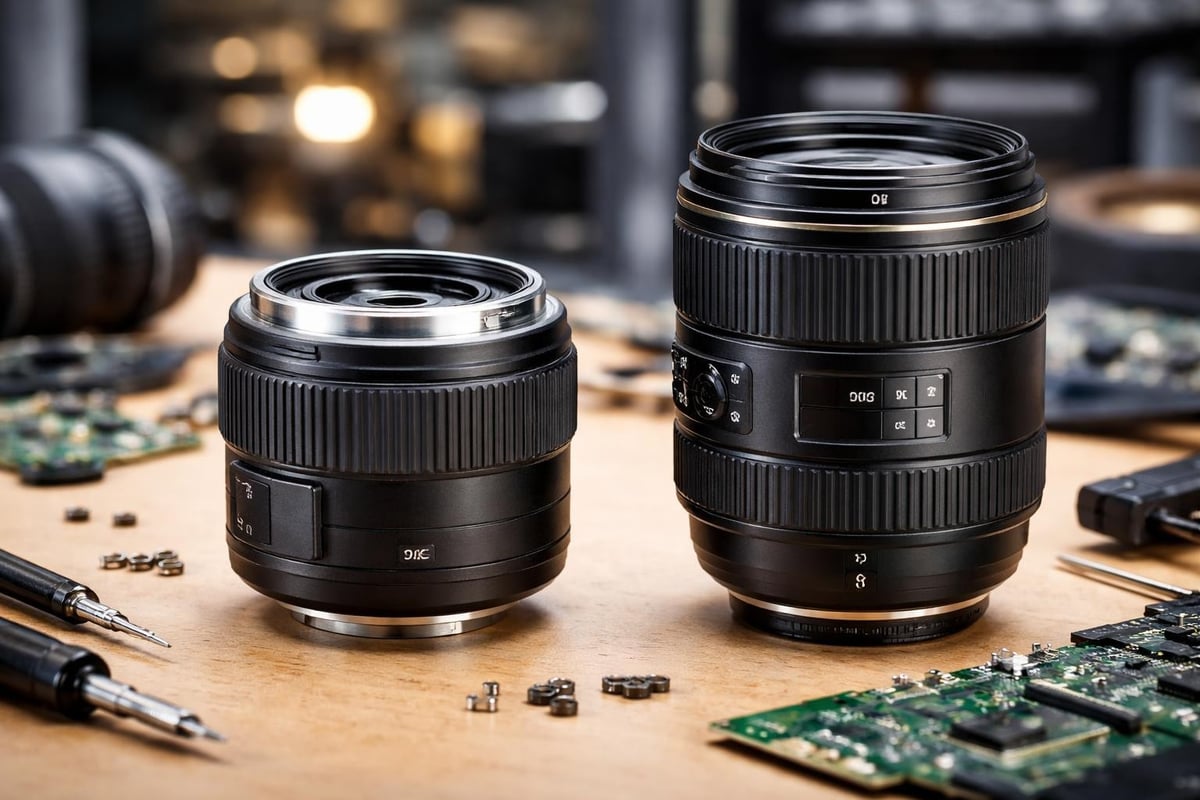
Budget lenses typically make compromises in build quality rather than optical performance. You’ll find more plastic components, simpler weather sealing (if any), and slower autofocus motors. But the glass elements themselves? Those can be surprisingly good.
What separates cheap from expensive glass
The most significant differences usually show up in edge-to-edge sharpness, chromatic aberration control, and bokeh quality. Expensive lenses render backgrounds more smoothly and maintain sharpness across the entire frame even at wide apertures. Cheap lenses often excel in the center but show softness in the corners.
Key areas where budget lenses compromise:
- Build materials and weather resistance
- Autofocus speed and accuracy
- Maximum aperture capabilities
- Edge-to-edge optical performance
- Special coatings for flare and ghosting reduction
That said, modern manufacturing techniques have improved dramatically. Computer-aided design and better quality control mean that even the cheapest camera lenses can deliver sharp images in good lighting conditions.
Prime lenses offer the best value for budget-conscious photographers
If you’re shopping for affordable glass, prime lenses should be your first stop. Fixed focal lengths are simpler to design and manufacture, which means better optical quality at lower prices. The 50mm f/1.8 has become legendary in every major camera system for good reason.
For Sony E-mount shooters, the Sony FE 50mm F1.8 remains one of the smartest purchases you can make. It’s lightweight, sharp, and the f/1.8 aperture gives you decent low-light performance and background separation. I’ve used this lens for paid work, and clients couldn’t tell the difference between images shot on this and Sony’s GM lenses.
Nikon users have the AF-S DX Nikkor 35mm f/1.8G, which has been a staple in crop-sensor kits for years. On an APS-C body, it provides a natural field of view that works for everything from street photography to environmental portraits. The optical performance punches way above its price point.
Third-party manufacturers are changing the game
Companies like Viltrox, Sigma, and Tamron have become serious competitors to first-party options. Viltrox’s range of affordable prime lenses delivers image quality that rivals much more expensive alternatives while undercutting on price significantly.
| Manufacturer | Example Model | Approximate Price | Key Advantage |
|---|---|---|---|
| Viltrox | AF 85mm F1.4 Pro | $400 | Professional bokeh quality |
| Yongnuo | 50mm f/1.8 | $75 | Extremely affordable entry |
| Sigma | Contemporary series | $400-600 | Excellent optics |
| Samyang/Rokinon | AF 35mm f/2.8 FE | $300 | Compact design |
The Samyang/Rokinon AF 35mm f/2.8 FE deserves special mention as one of the most compact and affordable autofocus wide-angle primes available. It’s not the fastest lens, but for travel and everyday shooting, the small size and sharp optics make it incredibly practical.
Zoom lenses that don’t sacrifice too much quality
While prime lenses offer the best bang for buck, zoom lenses provide versatility that’s hard to beat. The challenge is finding options that maintain decent optical quality across their zoom range without costing a fortune.
Kit lenses get a bad reputation, but many modern kit zooms are actually quite capable. They’re typically slow at f/3.5-5.6, which limits low-light performance, but in decent lighting conditions, they produce perfectly usable images.
Standard zoom options worth considering
The 18-55mm range (or its full-frame equivalent) covers most general photography needs. Every major manufacturer offers a budget version of this focal length. These lenses won’t win awards, but they’ll help you learn composition and understand which focal lengths you prefer before investing in faster glass.
What to expect from budget zoom lenses:
- Variable maximum aperture that changes with focal length
- Plastic construction throughout
- Noticeable distortion at extreme focal lengths
- Good sharpness when stopped down to f/8
- Compact size and light weight
I still keep a budget zoom in my bag for situations where I need flexibility more than ultimate image quality. It’s also the lens I hand to someone else when they want to try my camera without risking expensive gear.
For those looking to explore telephoto options without the hefty price tag, 55-200mm and 70-300mm lenses from both first and third-party manufacturers provide surprising reach. Image stabilization becomes crucial at these focal lengths, so prioritize options that include it even if it means spending slightly more.
Specialty lenses that break the budget barrier
Creative photography doesn’t require expensive gear. Some of the most interesting effects come from specialty lenses that are surprisingly affordable when you look beyond the major brands.
Manual focus lenses have made a comeback, particularly for video and artistic photography. Without autofocus motors and electronic components, manufacturers can focus purely on optical design while keeping costs down. Learning to focus manually also makes you a more deliberate photographer.
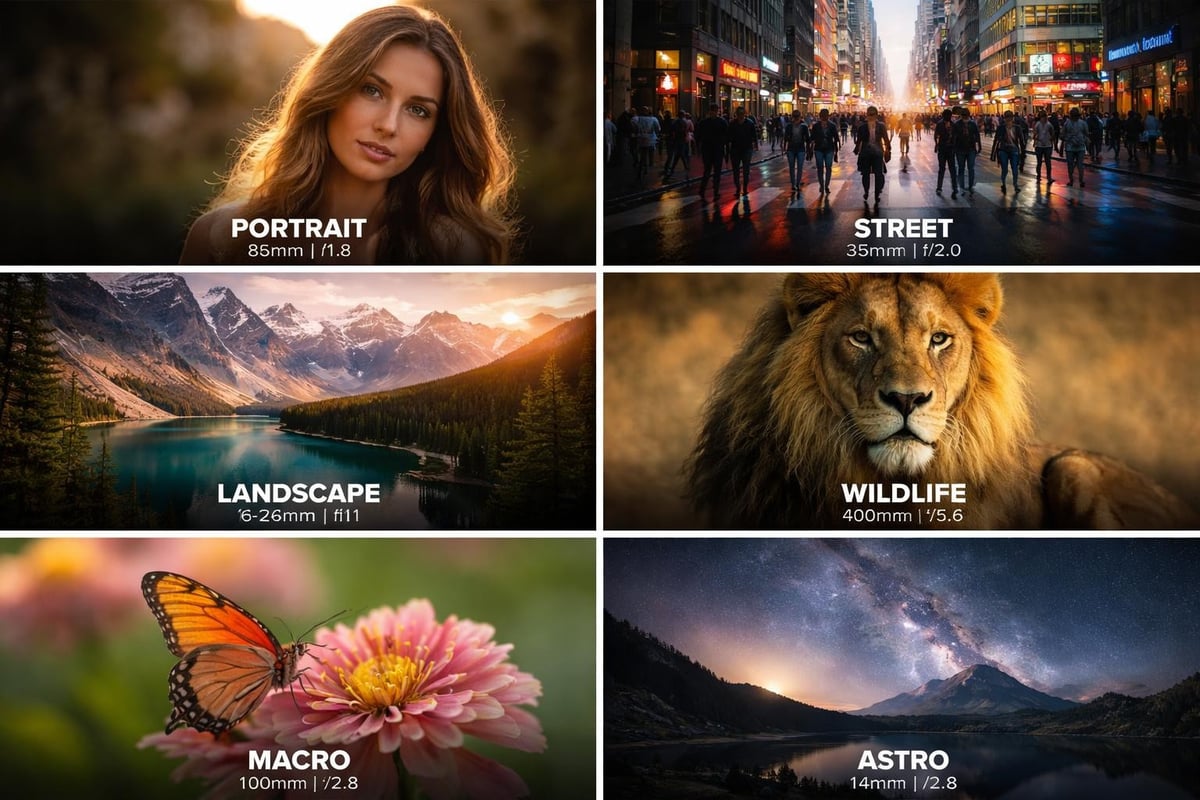
Macro photography on a budget
True 1:1 macro reproduction used to mean spending serious money. That’s changed. Several manufacturers now offer budget macro lenses that deliver genuine macro capabilities. You’ll need to accept manual focus in some cases, but the optical quality is there.
Extension tubes provide another route into macro photography for under $100. They work with existing lenses to decrease minimum focusing distance, turning a standard lens into a capable macro setup. The downside is reduced light transmission and the need to focus manually, but the price makes it easy to experiment.
Exploring creative focal lengths
Anamorphic lenses for filmmakers used to exist only in the realm of Hollywood budgets. Now, budget options bring that distinctive widescreen look to independent creators. The image quality isn’t perfect, but the creative possibilities are endless.
If you’re building out your lens collection, consider focal lengths that complement your existing setup rather than duplicating capabilities. An 85mm portrait lens or a 24mm wide-angle might serve you better than another standard zoom.
How to evaluate budget lenses before buying
Research matters more when buying cheap lenses because quality control can vary more than with premium options. I always check multiple sources and look for consistent feedback rather than relying on a single review.
Sample variation is real. Sometimes you get a great copy of a budget lens, sometimes you don’t. Understanding the return policy before purchasing gives you options if your specific lens underperforms.
Testing techniques that reveal lens quality
Center sharpness test: Shoot a detailed subject at various apertures from wide open to f/11. The center should be sharp by f/5.6 at minimum.
Corner performance check: Include frame edges in your test shots. Budget lenses often show softness here, but it shouldn’t be extreme.
Chromatic aberration evaluation: Photograph high-contrast edges (tree branches against bright sky). Purple or green fringing indicates poor CA control.
Bokeh assessment: If the lens has a reasonably wide aperture, shoot out-of-focus highlights. Smooth, round circles are ideal; nervous, onion-ring patterns are less pleasant.
| Test Scenario | What to Look For | Acceptable Budget Performance |
|---|---|---|
| Bright daylight | Overall sharpness | Sharp center, slight edge softness |
| Backlit subjects | Flare and ghosting | Minimal impact when stopped down |
| Low light | Autofocus accuracy | Consistent at f/2.8 or slower |
| Close distance | Minimum focus capability | Sharp at closest focus point |
Remember that most image quality issues can be corrected in post-processing to some degree. Chromatic aberration, distortion, and vignetting are all fixable. What you can’t fix is poor build quality that leads to early failure.
Matching lenses to your actual shooting needs
The cheapest camera lenses become expensive mistakes if they don’t match your photography style. I’ve wasted money on lenses that looked like great deals but sat unused because they didn’t fit how I actually work.
Think about the conditions where you shoot most often. If you’re primarily outdoors in good light, slower apertures matter less. If you shoot events or indoor sports, you need all the light-gathering capability you can afford.
Genre-specific recommendations
Portrait photography: A fast 50mm or 85mm prime delivers professional results. The shallow depth of field separates subjects beautifully, and these focal lengths provide flattering perspective.
Landscape work: Wide-angle zooms or primes in the 16-35mm range capture expansive scenes. You’ll typically shoot at f/8-f/11 anyway, so slower maximum apertures aren’t a limitation.
Street photography: Compact 28mm or 35mm primes keep you mobile and unobtrusive. Manual focus options can be even cheaper and teach you to pre-focus for decisive moments.
Wildlife and sports: This is where budget options struggle most. You need reach and speed, which means expensive glass. Consider starting with a slower 70-300mm and upgrading as your skills develop.
For photographers working within tight budgets, checking resources like our guide to best cameras under $700 can help balance body and lens investments effectively.
Long-term value and upgrade paths
Buying cheap doesn’t mean buying disposable. Some budget lenses hold their value remarkably well and remain useful even as you upgrade your camera body. Others become obsolete quickly.
Prime lenses tend to age better than zooms. A good 50mm f/1.8 will produce the same image quality whether mounted on a ten-year-old camera or the latest model. Zooms with outdated coatings or optical designs show their age more obviously.
When to save versus when to spend
I follow a simple rule: buy the cheapest option that meets your minimum requirements for lenses you’ll use occasionally, invest more in glass you’ll use constantly. Your everyday workhorse lens deserves a bigger budget than something you’ll pull out a few times per year.
Lenses worth spending extra on:
- Your primary focal length for paid work
- Specialty glass that has no budget alternatives
- Ultra-wide or super-telephoto options where quality matters
- Any lens used in challenging conditions requiring weather sealing
Lenses where budget options excel:
- Experimental focal lengths you’re testing
- Backup copies of existing lenses
- Focal lengths used only in controlled conditions
- Learning tools for beginners
The used market offers another avenue for finding deals. Premium lenses from five years ago often outperform brand-new budget options while costing similar amounts. Check reputable sellers and verify the lens condition before purchasing.
The reality of image quality differences
Here’s what rarely gets discussed: the difference between cheap and expensive lenses matters far less than the difference between good and bad technique. I’ve seen breathtaking images from budget glass and terrible photos from top-tier lenses.
Modern sensors have become so good that lens limitations show up less than they used to. A 24-megapixel sensor from 2026 can’t resolve enough detail to fully expose the weaknesses of most budget lenses when viewing at normal sizes.
Where expensive lenses actually matter
Professional work at large print sizes reveals optical quality differences. If you’re printing at 24×36 inches or larger, premium glass shows its advantage. For web use, social media, and prints under 16×20, budget lenses perform admirably.
Challenging lighting conditions separate cheap from expensive options. Low light, extreme backlight, and high-contrast scenes push lenses hard. This is where advanced coatings, better glass formulations, and superior designs justify higher costs.
Looking at the broader context of photography equipment helps maintain perspective. Lighting, composition, and timing contribute more to image quality than minor optical differences between lenses.
Accessories that maximize budget lens performance
Smart accessories can help budget lenses perform better and last longer. I consider these essentials rather than optional extras.
UV or clear protective filters prevent front element damage. Yes, they add another piece of glass between your sensor and subject, but replacing a scratched filter costs far less than repairing a damaged lens. Buy decent filters though, not the cheapest possible options.
Essential add-ons for cheap lenses
Lens hoods improve contrast by blocking stray light, which particularly benefits budget lenses with less advanced coatings. Many cheap lenses ship without hoods to reduce package costs, so budget $15-30 for this critical accessory.
A basic cleaning kit maintains optical performance. Dust, fingerprints, and smudges degrade image quality from any lens, expensive or cheap. Regular cleaning preserves sharpness and contrast.
| Accessory | Cost Range | Performance Impact |
|---|---|---|
| UV filter | $15-40 | Protects front element |
| Lens hood | $10-30 | Reduces flare, improves contrast |
| Cleaning kit | $15-25 | Maintains optical clarity |
| Lens pouch | $10-20 | Prevents handling damage |
| Step-up rings | $5-15 | Shares filters across lenses |
For videographers exploring budget filmmaking options, cheap lenses can deliver cinematic results with proper ND filters and stabilization accessories.
Making the most of aperture limitations
Slower maximum apertures represent the most common compromise in budget lenses. An f/3.5-5.6 zoom can’t match the low-light performance or shallow depth of field of an f/2.8 option, but you can work around these limitations.
Raising ISO compensates for less light transmission. Modern cameras handle ISO 3200 or even 6400 cleanly, which wasn’t true just a few years ago. What used to require f/2.8 at ISO 800 now works at f/5.6 with higher ISO settings.
Creative workarounds for slow apertures
Distance creates depth of field separation even with slower apertures. Moving closer to your subject and increasing the background distance achieves pleasing bokeh even at f/5.6. This technique works particularly well for environmental portraits.
Maximizing slow aperture lenses:
- Shoot in better light whenever possible
- Use camera stabilization or tripods for slower shutter speeds
- Embrace higher ISO settings with modern sensors
- Focus on composition rather than bokeh
- Stop down for maximum sharpness anyway
Many situations benefit from deeper depth of field. Landscape, architecture, and group photos often require f/8 or smaller apertures. In these scenarios, a slow lens causes no disadvantage whatsoever.
Real-world performance from affordable options
I’ve used budget lenses for paid assignments, and clients were satisfied with the results. The Viltrox AF 85mm F1.4 Pro particularly impressed me with its bokeh quality and sharpness, delivering results comparable to first-party options costing twice as much.
Testing various budget APS-C lenses revealed that most modern options deliver acceptable sharpness and color rendition for general use. The differences exist but don’t prevent creating compelling images.
Understanding which budget lenses deliver quality helps photographers allocate limited funds effectively across their entire kit rather than overspending on a single piece of glass.
Success stories with cheap glass
Documentary photographers often rely on budget lenses for their work. The rough handling and unpredictable conditions mean expensive gear faces higher risk. Cheap lenses deliver the image quality needed while reducing anxiety about equipment damage.
Travel photographers similarly benefit from affordable options. Carrying multiple focal lengths without the weight and cost of premium lenses enables creative flexibility. A set of budget primes weighs less and costs less than a single professional zoom.
The key insight here is matching equipment to actual needs rather than aspirational ideals. Most photographers benefit more from three budget lenses covering different focal lengths than one expensive lens with limited versatility.
Building a complete lens kit affordably
Strategic purchasing builds capable lens collections without massive investment. Start with versatile focal lengths, then add specialization as your needs clarify.
A three-lens kit covering wide, normal, and telephoto ranges handles most photography situations. For APS-C cameras, that might mean 24mm, 35mm, and 85mm equivalent lenses. Full-frame shooters could opt for 28mm, 50mm, and 85mm options.
Budget-friendly starter kit examples:
- APS-C setup: 24mm f/2.8, kit 18-55mm, 50mm f/1.8
- Full-frame basics: 35mm f/2.8, 50mm f/1.8, 85mm f/1.8
- Zoom-focused kit: 18-55mm, 55-200mm, 35mm f/1.8
- Prime-only approach: 28mm f/2.8, 50mm f/1.8, 85mm f/2
Buy used when appropriate. Premium lenses from previous generations offer excellent value. A used professional lens often outperforms a new budget option while costing the same or less.
Watch for sales cycles. Camera manufacturers typically discount lenses during major shopping periods. Patience can save 20-30% on already affordable options.
Final considerations before purchasing
Research thoroughly but don’t overthink the decision. Perfect lenses don’t exist at any price point. Every option involves compromises, and budget lenses simply make different trade-offs than expensive ones.
Rent before buying when possible. Spending $30-50 to test a lens for a weekend prevents expensive mistakes. You’ll quickly discover whether a lens matches your shooting style and quality expectations.
Consider the total system cost. Buying into a lens ecosystem represents a long-term commitment. Some camera systems offer more affordable glass options than others. Factor this into camera body decisions, particularly when starting fresh.
The cheapest camera lenses available today deliver image quality that would have amazed photographers from just a decade ago. Manufacturing improvements, better materials, and increased competition have driven prices down while maintaining acceptable optical performance. Success comes from understanding what you actually need versus what marketing suggests you want, then finding the budget options that meet those real requirements without unnecessary extras that inflate costs.
Budget glass opens photography to more people while helping experienced shooters explore new focal lengths without major financial commitment. Finding the right balance between cost and capability means understanding how different lenses perform in real conditions rather than just comparing specification sheets. Whether you’re just starting your photography journey or expanding an existing collection, Lens and Shutter provides detailed reviews and practical guidance to help you make informed decisions about lenses and camera equipment that match your creative vision and budget.