
If you want the short version, the best camera for wildlife photography is the one that keeps your keeper rate high when the subject is distant, moving fast, and active in bad light. For most readers, that means strong animal-eye autofocus, a deep enough buffer for bursts, and a body that matches how you actually shoot: full frame if low light and cropping headroom matter most, APS-C if you want more apparent reach for birds without carrying a huge lens.
My current shortlist breaks down pretty clearly. The Sony A1, Canon R3, and Nikon Z9 are the serious no-compromise bodies. The Canon R7 is still one of the smartest wildlife buys if birding reach and value matter more than full-frame noise performance. The Sony A7 IV and Nikon Z6 II make more sense if you want one camera that can handle wildlife well without becoming a dedicated specialist body.
Contents
- Quick answer: which wildlife camera should you buy?
- What matters most in a wildlife camera
- Full frame or APS-C for wildlife?
- Burst rate and buffer depth matter more than specs suggest
- The best high-end cameras for wildlife photography
- The best wildlife cameras for value, travel, and all-around use
- Specialized features that enhance field work
- Weather sealing and durability requirements
- Lens pairing considerations for complete systems
- Battery life and power management
- Learning curves and customization depth
- Making the final decision
- Maintaining perspective on gear versus skill
- Technical specifications that deserve attention
- Future-proofing your investment
- Regional and specialty considerations
- Physical ergonomics and long-term comfort
Quick answer: which wildlife camera should you buy?
If your main goal is bird photography, I would start with a fast APS-C body or a full-frame body with excellent animal tracking and plenty of room to crop. If you mostly photograph larger mammals at dawn and dusk, I would lean full frame for cleaner files at high ISO. If you hike a lot or travel for wildlife, weight matters more than spec-sheet bragging rights, because the best autofocus in the world does not help if the kit stays in camp.
The clearest buyer fits from this list:
- Best overall for serious wildlife work: Sony A1
- Best for tracking fast action: Canon R3
- Best for hybrid shooters who also care about video: Nikon Z9
- Best value pick for birding reach: Canon R7
- Best all-arounder if wildlife is only part of what you shoot: Sony A7 IV
- Best choice if you want a balanced Nikon full-frame body for wildlife: Nikon Z6 II
That is the real intent behind this roundup, so the rest of the guide is built around the questions that actually decide the purchase: how much reach you need, how dependable the autofocus is on birds and mammals, how long the buffer lasts when action suddenly starts, and whether the body is realistic to carry with a long lens.
What matters most in a wildlife camera
The fastest way to narrow the field is to judge every body on four things that directly affect keeper rate. First is autofocus tracking, especially bird and animal detection that can stay locked when the subject crosses branches, reeds, or messy backgrounds. Second is burst rate plus usable buffer depth, because a headline frame rate means very little if the camera chokes halfway through a takeoff sequence. Third is sensor format, since APS-C and full frame solve different problems in the field. Fourth is stabilization and overall handling, because wildlife photographers spend a lot of time shooting handheld with long lenses from awkward positions.
My wildlife buying checklist:
- Reliable animal or bird eye detection, not just a high focus-point count
- Enough burst depth to hold a full action sequence in RAW
- A sensor choice that matches your real need for reach versus low-light performance
- Weather sealing and controls you can trust in cold, dust, or rain
- A lens ecosystem with realistic telephoto options, not just an impressive body spec sheet
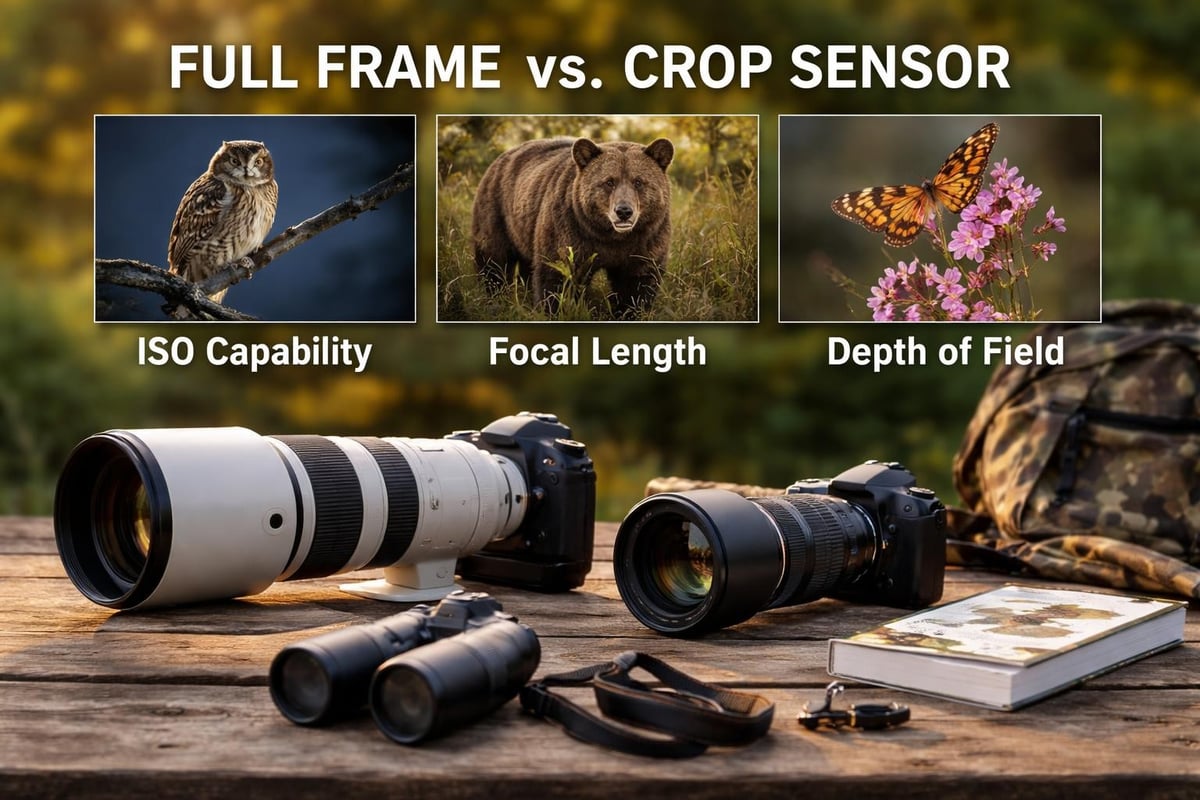
Full frame or APS-C for wildlife?
This is usually the first real decision, and it is more important than brand loyalty. Full-frame bodies are stronger when you shoot in dim forests, at dawn, or late in the day and need cleaner high-ISO files. APS-C bodies make more sense when you regularly photograph small, distant subjects and want more subject size in the frame without jumping straight to a massive 600mm prime.
Choose full frame if low light and tracking consistency come first
Full frame still gives you the easiest path to cleaner files when wildlife activity peaks in ugly light. That matters for mammals at sunrise, overcast wetlands, and any situation where you are already pushing shutter speed to freeze movement. A strong full-frame body also tends to give you the most refined autofocus behavior, the deepest pro controls, and the best upgrade path if wildlife becomes a serious long-term pursuit.
Choose APS-C if birding reach and portability matter more
APS-C remains the smarter answer for many wildlife photographers, especially birders. The extra effective reach lets a 100-400mm or 150-600mm setup work much harder, and a lighter kit is easier to carry on long walks, travel days, and hand-held sessions. The trade-off is that you usually give up some high-ISO flexibility, so APS-C makes the most sense when reach is your limiting factor more often than low light.
| Question | Full Frame Answer | APS-C Answer |
|---|---|---|
| Do you shoot most often in poor light? | Usually the better choice | Possible, but less forgiving |
| Are small birds your main subject? | Works well if you can afford longer glass | Usually the better value |
| Do you want a lighter travel-friendly kit? | Possible, but often more expensive | Easier to build on a budget |
| Do you crop heavily after the fact? | Better if you start with plenty of resolution | Better if you need more subject size in camera |
| Are you building a dedicated wildlife kit? | Best long-term ceiling | Best practical starting point for many readers |
Burst rate and buffer depth matter more than specs suggest
Manufacturers advertise maximum burst rates prominently, but the practical usability depends equally on buffer depth and clearing speed. A camera shooting 20 frames per second sounds impressive until the buffer fills after two seconds and locks you out for fifteen seconds while writing to the card.
I’ve missed critical moments because I assumed the buffer would handle extended sequences. A bird taking flight, shaking water droplets in perfect light, all captured beautifully until frame 47 when the camera suddenly stops firing. The sequence I needed was frames 52 through 61.
Matching burst rates to subject behavior
Different wildlife subjects require different approaches to continuous shooting. Small birds demand maximum speed because their movements happen in fractions of seconds. Larger mammals like bears or elephants move more deliberately, making moderate burst rates of 8-10 fps entirely adequate while conserving buffer capacity for longer sequences.
The buffer depth becomes crucial when you can’t predict action duration. Seal colonies involve constant interaction between animals. Eagles at fishing spots make multiple strike attempts. Prairie dog colonies feature simultaneous activity across dozens of individuals. These scenarios benefit from deep buffers that allow sustained shooting without interruption.
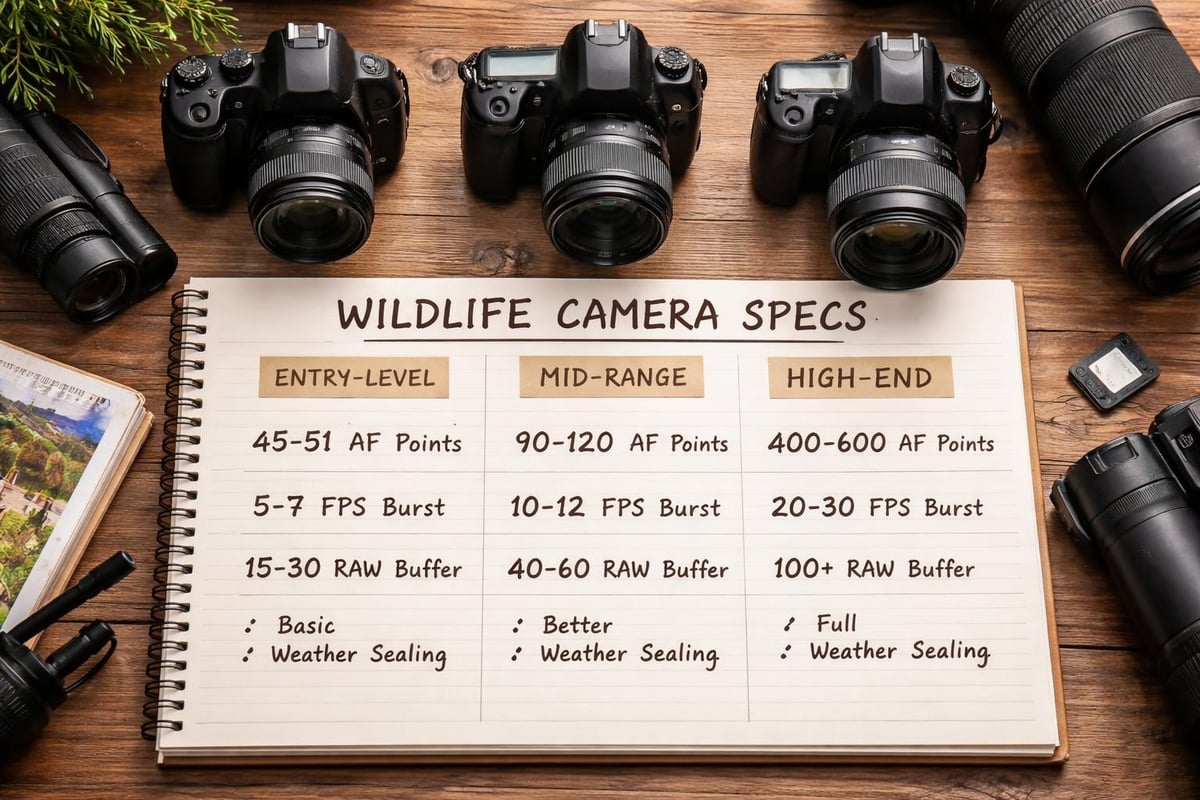
Recommended burst specifications by subject:
- Small birds in flight: 15+ fps with 100+ RAW buffer
- Birds of prey hunting: 12+ fps with 75+ RAW buffer
- Running mammals: 10+ fps with 60+ RAW buffer
- Marine mammals: 8+ fps with 50+ RAW buffer
- Large terrestrial mammals: 6+ fps with 40+ RAW buffer
The best high-end cameras for wildlife photography
If you want the best cameras for wildlife photography without major compromise, this is the tier that earns its price. These are the bodies I would point to for dedicated bird photographers, safari shooters, and anyone who regularly works in fast action or punishing conditions.
Best flagship bodies for birds, action, and demanding field work
Sony’s Alpha 1 delivers 30 fps with continuous autofocus and exposure updates, paired with a 50 megapixel sensor that maintains excellent high ISO performance. The bird eye detection works remarkably well even on small subjects at distance. The electronic viewfinder refreshes at 240 fps, eliminating blackout during bursts and maintaining visual connection with fast-moving subjects.
Canon’s R3 focuses heavily on subject tracking refinement with eye control autofocus that lets you select focus points by looking at them through the viewfinder. The 24 megapixel sensor prioritizes speed and low light capability over resolution. For photographers who rarely crop extensively and value frame rate, this balance makes sense.
Nikon’s Z9 combines 45.7 megapixels with 20 fps shooting and no mechanical shutter, eliminating vibration entirely. The pre-release capture function records frames before you fully depress the shutter, capturing moments your reaction time would normally miss. This feature alone has saved numerous shots when anticipating action proved slightly off.
The Z9 also offers impressive video capabilities for photographers who want to expand into filmmaking. Understanding the best cameras for capturing high-resolution footage becomes increasingly relevant as wildlife content creation diversifies beyond still images.
Table could not be displayed.
DSLR options still hold value
Mirrorless systems dominate current development, but high-end DSLRs remain viable tools. The Canon EOS 1D X Mark III and Nikon D6 provide proven autofocus systems, exceptional build quality, and extensive lens ecosystems. Battery life substantially exceeds mirrorless equivalents, valuable during multi-day field sessions far from charging options.
The optical viewfinder shows the actual scene without electronic processing lag or battery drain. Some photographers still prefer this direct connection, particularly when tracking subjects across varied backgrounds where EVF rendering can occasionally stutter.
The best wildlife cameras for value, travel, and all-around use
This is the section most readers should pay attention to. These cameras give you a realistic path into wildlife photography without forcing you into flagship prices, and the right one depends on whether you care most about reach, versatility, or staying in a specific lens system.
Best mid-range picks by buyer type
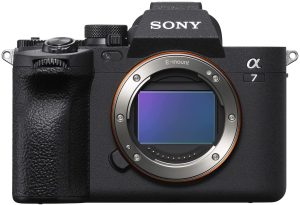
The Sony A7 IV combines 33 megapixels with 10 fps shooting and the same subject recognition algorithms from higher-tier models. The autofocus system performs admirably in most situations, only falling slightly behind flagship speed in extremely low contrast scenarios. For many photographers shooting in reasonable light, this difference never materializes.
If your budget is limited, I would still avoid buying purely on megapixels or a brand name. Wildlife is one of the easiest genres to outgrow a weak autofocus system, so I would rather buy a slightly older or less glamorous body with dependable subject tracking than chase a cheaper spec sheet.
Canon’s R7 represents the crop sensor approach done properly. The 32.5 megapixel APS-C sensor pairs with 15 fps mechanical shutter shooting and 30 fps electronic shutter. Subject detection includes animals and vehicles. The 1.6x crop factor extends telephoto reach meaningfully. A 100-400mm lens becomes 160-640mm equivalent, providing serious range at reasonable cost and weight.
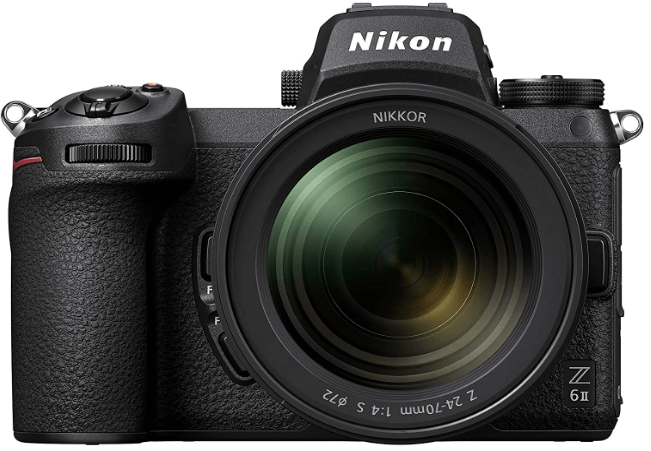
Nikon’s Z6 II offers dual card slots, 14 fps shooting, and solid low light performance at a mid-range price. The 24 megapixel resolution balances file size with image quality. While the autofocus doesn’t match newer Z9 sophistication, it handles most wildlife scenarios competently when you understand its limitations and work within them.
Choosing based on ecosystem and glass
Camera bodies evolve rapidly, but lens investments last decades. Sony’s E-mount system provides extensive telephoto options from multiple manufacturers. Canon and Nikon offer comparable ranges but typically at higher price points for equivalent specifications.
Third-party manufacturers like Sigma and Tamron produce excellent wildlife lenses for multiple mounts. A Sigma 150-600mm Contemporary lens delivers impressive performance at roughly half the cost of comparable first-party options. The image quality differences exist but remain subtle enough that many photographers happily accept the trade-off.
| Camera Model | Sensor Type | Burst Rate | AF Points | Best For |
|---|---|---|---|---|
| Sony A1 | Full Frame | 30 fps | 759 | Professionals needing maximum speed |
| Canon R3 | Full Frame | 30 fps | 1,053 | Sports and action specialists |
| Nikon Z9 | Full Frame | 20 fps | 493 | Hybrid photo/video workflows |
| Sony A7 IV | Full Frame | 10 fps | 759 | Enthusiasts wanting flagship AF |
| Canon R7 | Crop Sensor | 15 fps | 651 | Telephoto reach priority |
| Nikon Z6 II | Full Frame | 14 fps | 273 | Balanced performance value |
Specialized features that enhance field work
Beyond core specifications, certain features significantly improve the wildlife photography experience. These capabilities might not appear prominently in marketing materials but prove invaluable during actual shooting sessions.
Silent shooting modes
Electronic shutters eliminate mechanical noise entirely. This matters enormously when photographing skittish subjects that flee at unfamiliar sounds. Owls, nesting birds, and many mammals react to shutter clicks by changing behavior or departing completely. Silent mode allows closer approaches and more natural behavior documentation.
The trade-off involves rolling shutter artifacts when subjects or camera move rapidly during exposure. Fast-flying birds may show slight distortion. Understanding when to accept this compromise versus using mechanical shutter becomes part of your technical knowledge.
In-body image stabilization effectiveness
IBIS systems compensate for camera shake across multiple axes. When shooting handheld with long telephoto lenses, even slight movements blur images. Modern stabilization systems claim 5-7 stops of compensation, though real-world results typically deliver 3-4 stops reliably.
The practical benefit lets you shoot at slower shutter speeds during marginal light. Instead of requiring 1/1000 second with a 500mm lens, you might achieve sharp results at 1/250 second. This flexibility often means the difference between capturing or missing a shot entirely.
Dual card slots for security
Professional work demands redundancy. Writing identical files to two cards simultaneously ensures drive failure doesn’t erase irreplaceable images. After experiencing a card failure that erased an entire day’s work photographing rare species, I never use single-slot cameras for serious projects.
The performance impact from simultaneous writing remains minimal on modern processors. Some cameras offer overflow mode where the second card activates only when the primary fills, but redundancy mode provides better protection against the catastrophic loss that haunts every photographer.
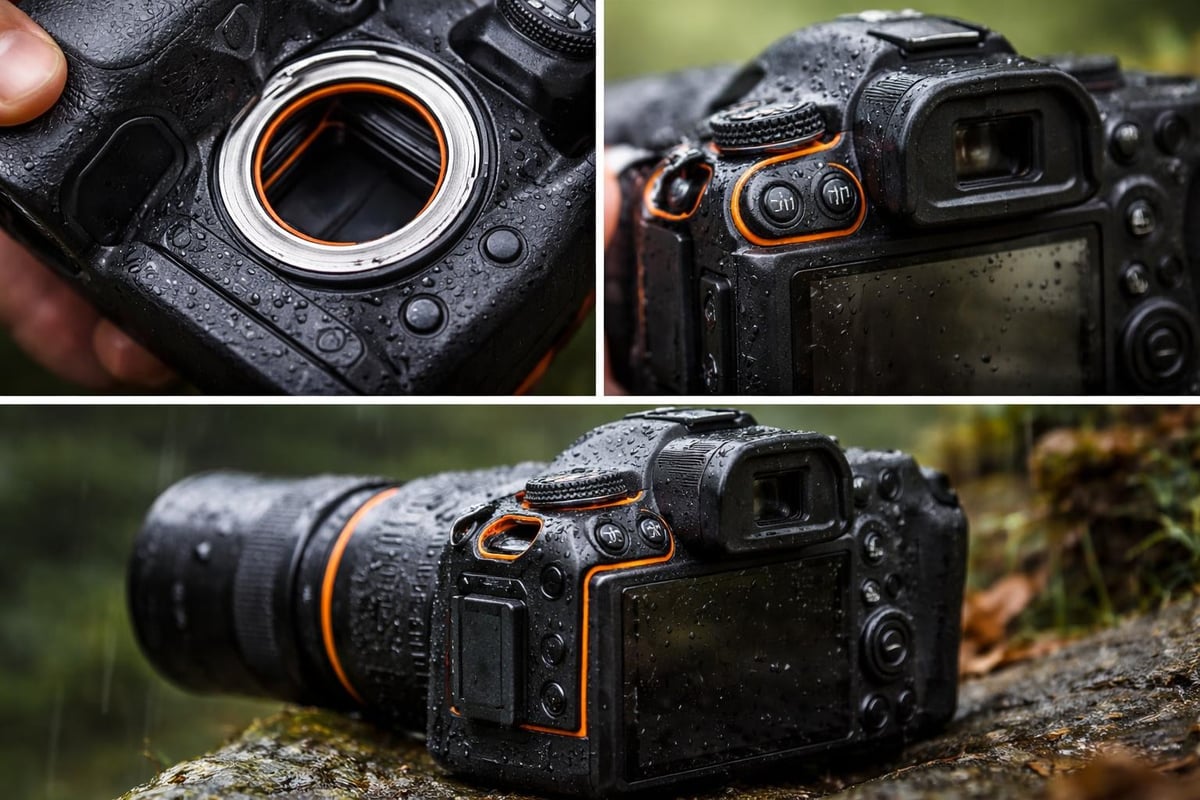
Weather sealing and durability requirements
Wildlife photography happens in conditions that would make studio photographers shudder. Rain, snow, dust, extreme temperatures, and humidity all threaten electronic equipment. The best cameras for wildlife incorporate protection against these elements without compromising functionality.
Real gasket protection versus marketing claims
True weather sealing involves gaskets around every button, dial, door, and port. The body joints include similar protection. Professional models use magnesium alloy construction that provides structural rigidity while managing weight. The Canon 1D X Mark III and Nikon D6 can handle direct rain for extended periods. I’ve shot in downpours that soaked me completely while cameras continued functioning perfectly.
Mid-range models often claim weather sealing but implement it less comprehensively. Some moisture resistance exists but extended exposure to rain or dust risks damage. Understanding your specific model’s actual protection level prevents expensive mistakes during challenging shoots.
Operating temperature ranges
Arctic and desert photography push cameras beyond typical specifications. Most consumer cameras list operating ranges from 32°F to 104°F. Professional models extend this to 14°F to 113°F or beyond. Batteries drain faster in cold, LCD screens slow in extreme cold, and condensation risks occur during rapid temperature changes.
I’ve photographed in temperatures from minus 20°F to 110°F. The preparation differs dramatically between extremes. Cold weather requires keeping spare batteries warm against your body. Heat demands protecting cameras from direct sun and allowing acclimation time when moving between air-conditioned vehicles and outdoor conditions.
Lens pairing considerations for complete systems
Even the best cameras for wildlife produce disappointing results when paired with inadequate lenses. The telephoto range forms the foundation of wildlife photography, typically starting at 400mm and extending to 600mm or 800mm for serious work.
Prime versus zoom telephoto choices
Prime lenses like 500mm f/4 or 600mm f/4 provide maximum optical quality and widest apertures. The light-gathering capability helps both autofocus performance and shutter speed. The shallow depth of field isolates subjects beautifully. The downsides include substantial weight, often 7-10 pounds, and fixed focal length limiting compositional flexibility.
Zoom telephotos like 100-400mm, 150-600mm, or 200-600mm sacrifice maximum aperture, typically f/5.6 or f/6.3, for versatility. You can frame subjects without changing position, valuable when working from vehicles or fixed locations. Modern optical designs deliver impressive sharpness across the zoom range. The weight remains substantial but typically less than comparable primes.
Teleconverter compatibility
Teleconverters multiply focal length while reducing maximum aperture. A 1.4x converter on a 400mm f/2.8 lens creates a 560mm f/4. A 2x converter makes it 800mm f/5.6. This flexibility extends reach without carrying additional large lenses.
The image quality impact varies by lens and converter combination. First-party converters designed specifically for certain lenses maintain excellent performance. Generic converters or mismatched combinations often produce soft, low-contrast images. Autofocus speed typically decreases, and many cameras require f/5.6 or wider maximum aperture for all focus points to function.
Battery life and power management
Mirrorless cameras consume significantly more power than DSLRs due to constant sensor activation and electronic viewfinder operation. Flagship DSLR models often deliver 2,000+ shots per charge. Equivalent mirrorless cameras typically provide 400-700 shots under similar conditions.
Field charging solutions
Multi-day trips require power strategy beyond carrying spare batteries. USB-C charging capability on newer cameras allows charging from power banks, solar panels, or vehicle adapters. Some photographers carry small inverters to charge batteries from vehicle power overnight during camping trips.
I typically carry six batteries for mirrorless bodies on extended sessions. This sounds excessive until you spend 12 hours in a blind photographing nesting birds with the camera active continuously. Battery life specifications assume regular on/off cycling. Continuous use drains batteries much faster than rated capacity suggests.
Power saving configurations
Disabling features you don’t actively need extends operating time. Image review time, EVF brightness, and wireless connectivity all consume power. Setting aggressive sleep modes helps, though you risk missing sudden action while the camera wakes. Finding the balance between conservation and readiness becomes personal preference based on your typical subjects and shooting patterns.
Learning curves and customization depth
Professional cameras offer extensive customization allowing photographers to configure controls precisely for their workflow. This flexibility creates steeper learning curves but rewards investment with efficiency gains during critical moments.
Button layout and quick access
The ability to assign frequently used functions to physical buttons eliminates menu diving during shoots. I configure one button for subject tracking activation, another for focus area mode switching, and a third for ISO adjustment. These assignments vary between photographers based on personal priorities and shooting styles.
Understanding how to structure custom menus specific to different scenarios speeds workflow dramatically. Create a saved settings bank for bird photography, another for mammals, and a third for low-light situations. Switching between these configurations takes seconds versus manually adjusting a dozen parameters.
Auto ISO implementation
Properly configured Auto ISO removes one variable from your mental load during rapidly changing situations. Set minimum shutter speed to maintain sharpness based on focal length. Establish maximum ISO based on acceptable noise levels. The camera adjusts sensitivity automatically while you focus on composition and timing.
The freedom this provides surprised me initially. Instead of constantly checking exposure and adjusting ISO manually, I trust the camera to maintain settings within my defined parameters. This automation only works well when you’ve tested and understand your specific camera’s high ISO performance thoroughly.
Making the final decision
Choosing among the best cameras for wildlife requires honest assessment of your priorities, budget, and shooting style. Professional models offer undeniable advantages but cost substantially more than mid-range alternatives that might serve your actual needs perfectly well.
Evaluating upgrade paths
Consider not just current requirements but projected growth. If you plan to pursue wildlife photography seriously for years, investing in a more capable body initially might prove more economical than upgrading multiple times. Conversely, if you’re exploring whether wildlife photography suits you, starting with a mid-range model makes excellent sense.
The camera ecosystem matters as much as the body itself. Canon, Nikon, and Sony each offer complete systems with telephoto lenses, teleconverters, and accessories designed to work together seamlessly. Once you’ve invested in several lenses, switching systems becomes prohibitively expensive. Before you commit to a mount, look at the telephoto lens roadmap first. That will shape your wildlife results much more than a small difference between camera bodies.
Testing before purchasing
Rental services let you test expensive cameras during actual wildlife photography sessions before purchasing. A weekend with a flagship model in the field reveals far more than store handling. You’ll discover whether the weight feels manageable during hours of handholding, whether the autofocus system matches your shooting style, and whether the image quality justifies the cost difference versus alternatives.
If possible, rent before you buy. Wildlife is one of the few genres where balance, grip comfort, viewfinder behavior, and autofocus feel can matter almost as much as the raw spec sheet once you are carrying the camera for a full day.
Maintaining perspective on gear versus skill
The best cameras for wildlife certainly provide advantages, but they don’t replace fieldcraft, patience, and photographic vision. I’ve seen remarkable images captured with modest equipment by photographers who understood animal behavior and light quality. I’ve also seen mediocre results from flagship cameras in inexperienced hands.
Investing time learning your camera’s capabilities deeply produces better returns than constantly chasing newer models. Understanding exactly how your autofocus system behaves in different scenarios, knowing precisely where image quality begins degrading at high ISOs, and developing muscle memory for critical controls all matter more than marginal specification improvements in next year’s release.
The relationship between equipment and results is not linear. A flagship body can absolutely improve your keeper rate, but only if the rest of your workflow supports it. Fieldcraft, patience, and lens choice still matter more than buying the most expensive body in the roundup.
Technical specifications that deserve attention
Beyond the major features already discussed, several technical aspects influence long-term satisfaction with wildlife cameras. These details rarely receive headline attention but matter during extended use.
Viewfinder quality and magnification
Electronic viewfinder resolution, refresh rate, and magnification affect how well you can assess focus and composition while shooting. Higher resolution viewfinders, 5.76 million dots or above, show fine detail clearly. Refresh rates of 120 fps or higher reduce lag when tracking subjects. Magnification around 0.8x provides comfortable viewing without excessive eye strain during long sessions.
Eyepoint distance matters for eyeglass wearers. Longer eyepoint, 20mm or more, allows comfortable viewing while wearing glasses. Diopter adjustment range should accommodate your vision correction requirements. These ergonomic factors seem minor until you’ve spent eight hours peering through a viewfinder that doesn’t quite fit your visual needs.
Shutter mechanism durability
Professional cameras rate shutter mechanisms for 400,000 or 500,000 actuations. Enthusiast models typically rate 150,000 to 200,000 cycles. While many shutters exceed their ratings substantially, understanding expected lifespan helps with purchase planning and used camera evaluation.
Electronic shutters eliminate mechanical wear entirely but introduce rolling shutter considerations already discussed. Some cameras offer both mechanical and electronic first curtain modes. The hybrid approach balances mechanical wear reduction with artifact avoidance.
| Feature Category | Professional Priority | Enthusiast Consideration |
|---|---|---|
| Autofocus Points | 500+ with full coverage | 300+ with center concentration |
| Burst Rate + Buffer | 15+ fps, 100+ RAW | 8+ fps, 40+ RAW |
| Weather Sealing | Complete gasket protection | Moisture resistance |
| Battery Life | 700+ shots CIPA rated | 400+ shots acceptable |
| Build Material | Magnesium alloy | Polycarbonate composite acceptable |
| Shutter Rating | 400,000+ actuations | 150,000+ actuations |
Future-proofing your investment
Camera technology evolves continuously, but certain features indicate longer useful lifespans. Bodies with robust weather sealing, professional build quality, and comprehensive customization remain viable tools long after specifications become outdated.
Computational photography integration
Modern cameras increasingly incorporate computational features previously limited to smartphones. Focus stacking for extended depth of field, high-resolution composites from multiple frames, and AI-enhanced noise reduction all expand creative possibilities. These features often improve through firmware updates, extending camera capability without hardware changes.
The award-winning wildlife photographs being recognized today demonstrate that exceptional results still come from traditional photographic skills combined with reliable equipment. The focus should always remain on the story and moment rather than specification sheets.
Video capability evolution
Wildlife filmmaking grows increasingly accessible as camera video features advance. Internal 4K recording, high frame rates for slow motion, and professional codecs turn still cameras into capable video tools. If you anticipate exploring video alongside stills, prioritizing models with robust video features makes sense even if you don’t use them immediately.
Regional and specialty considerations
Different wildlife subjects and environments sometimes favor specific camera characteristics. Arctic photographers prioritize extreme cold performance and battery life. Tropical forest work demands superior high ISO capability for dark understory conditions. Marine photography from boats requires exceptional stabilization and weather sealing.
Underwater and extreme environment adaptations
Some wildlife photography happens in genuinely extreme conditions requiring specialized protection beyond standard weather sealing. Underwater housings for specific camera models enable marine photography. These custom enclosures cost thousands but provide complete submersion protection while maintaining full camera control.
Desert photography introduces dust challenges that defeat many weather sealing implementations. Fine particles infiltrate through gaps that repel water effectively. Regular professional cleaning becomes mandatory. Some photographers working extensively in dusty conditions choose cameras with minimal articulating parts and comprehensive sealing specifically for this environment.
Specialized environments exaggerate weaknesses quickly, which is why wildlife shooters benefit from buying for their most demanding real-world use rather than for occasional best-case scenarios.
Physical ergonomics and long-term comfort
Weight and handling characteristics matter enormously during extended shooting sessions. A camera that feels perfectly balanced in-store might cause fatigue after hours of handheld telephoto work. Grip depth, button placement, and overall weight distribution all contribute to sustainable handling.
Vertical grip integration
Battery grips improve handling when shooting in portrait orientation with heavy telephoto lenses. They also double battery capacity, crucial for mirrorless systems. First-party grips maintain weather sealing and integrate seamlessly with camera controls. Third-party options cost less but may compromise sealing or ergonomics.
The added weight and bulk make cameras less packable but improve stability during shooting. I use vertical grips on bodies dedicated to wildlife work but skip them on cameras that serve multiple roles requiring compact size.
Selecting the best cameras for wildlife ultimately involves balancing technical capability, budget realities, and personal shooting priorities. The flagship models from Canon, Nikon, and Sony deliver exceptional performance, but mid-range alternatives serve many photographers excellently while leaving budget for the telephoto lenses that matter equally. Whether you shoot birds in your local wetlands or plan bigger wildlife trips, the best choice is the camera that helps you get the shot consistently with the lenses you can realistically carry and afford.
Last update on 2026-06-17 / Affiliate links / Images from Amazon Product Advertising API